Only document cameras that connect to the computer via USB are listed here. For older style passthrough document cameras, simply power on the document camera to use it. Passthrough document cameras will usually have three cables connected to them whereas USB document cameras usually have only one or two.
#### Document Camera Types| [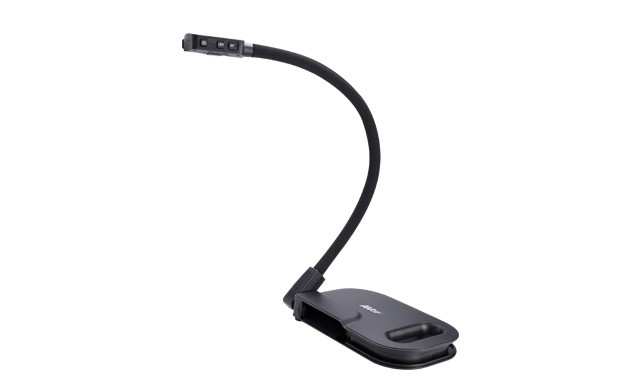](https://kb.princetonisd.net/books/classroom-troubleshooting/page/using-the-aver-u50-document-camera) Aver U50 ([KB Article](https://kb.princetonisd.net/books/classroom-troubleshooting/page/using-the-aver-u50-document-camera "Using the Aver U50 Document Camera")) | [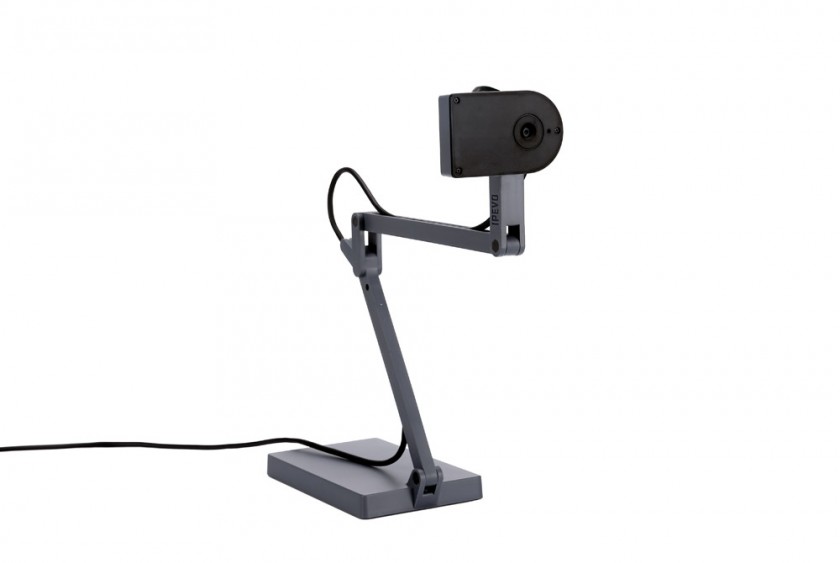](https://kb.princetonisd.net/books/classroom-troubleshooting/page/using-the-ipevo-ziggy-hd-document-camera) IPEVO Ziggy-HD ([KB Article](https://kb.princetonisd.net/books/classroom-troubleshooting/page/using-the-ipevo-ziggy-hd-document-camera "Using the IPEVO Ziggy-HD Document Camera")) |
| [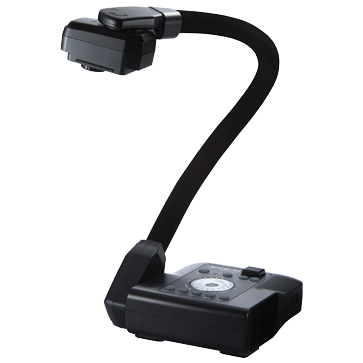](https://kb.princetonisd.net/books/classroom-troubleshooting/page/using-the-aver-cp135-document-camera) Aver CP135 ([KB Article](https://kb.princetonisd.net/books/classroom-troubleshooting/page/using-the-aver-cp135-document-camera "Using the Aver CP135 Document Camera")) | [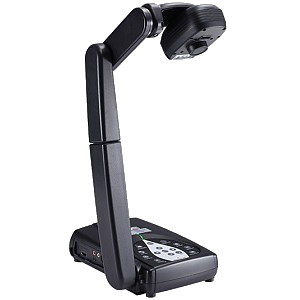](https://kb.princetonisd.net/books/classroom-troubleshooting/page/using-the-aver-300af-document-camera) Aver 300AF ([KB Article](https://kb.princetonisd.net/books/classroom-troubleshooting/page/using-the-aver-300af-document-camera "Using the Aver 300AF Document Camera")) |
| [](https://kb.princetonisd.net/books/classroom-troubleshooting/page/using-the-ladibug-dc-120-document-camera) Lumens LadiBug DC-120 ([KB Article](https://kb.princetonisd.net/books/classroom-troubleshooting/page/using-the-ladibug-dc-120-document-camera "Using the LadiBug DC-120 Document Camera")) | [](https://kb.princetonisd.net/books/classroom-troubleshooting/page/using-the-lumens-ladibug-dc-158-document-camera) Lumens LadiBug DC-158 ([KB Article](https://kb.princetonisd.net/books/classroom-troubleshooting/page/using-the-lumens-ladibug-dc-158-document-camera "Using the Lumens LadiBug DC-158 Document Camera")) |
The below procedure is for USB operation only. If the document camera has more than two cables connected to it, use the power button to toggle it on and off.
### Installing the Required Software In order to use the LadiBug DC-158 document camera, the Ladibug 2.0 software must be installed. If the Ladibug 2.0 software is missing, complete the following steps to install it. 1. Click on the App Portal icon in the taskbar. 2. From the left column, select Document Camera. 3. Click the Install button to the right of the Lumens Ladibug 2 software. 4. Once the Install button is replaced with an Uninstall button the software is installed. ### Starting the LadiBug DC-158 Document Camera To begin using the LadiBug DC-158 document camera, please follow the steps below. 1. Click on the Start button in the lower-left corner of the screen. 2. Type "Ladibug" in the search bar. 3. Click Ladibug 2.0 in the search results. ### Troubleshooting #### Black screen displayed (no video) 1. Check that the USB cable is connected to the computer. 2. Check that the USB cable is connected to the camera. 3. Disconnect and reconnect the USB cable. 4. Check that the document camera is powered on (the LED at the front should be blue) 5. Restart the Ladibug 2.0 application. 6. Click on the floating Ladybug icon. 7. Click the button in the top-left corner of the floating buttons so that it appears to be indented. 8. If these steps to not resolve the issue please create a ticket in Eduphoria. # Phone Information related to district desk phones and voicemail. # Reset Desk PhoneCompleting this procedure will cause call history and phone settings to be cleared. Voicemail will remain intact.
There are several issues that can be fixed by resetting your desk phone. This tutorial will walk you through the process of resetting each model of desk phone available in the district. **Find the picture of your phone below to get started.** --- ### Cisco CP-6945 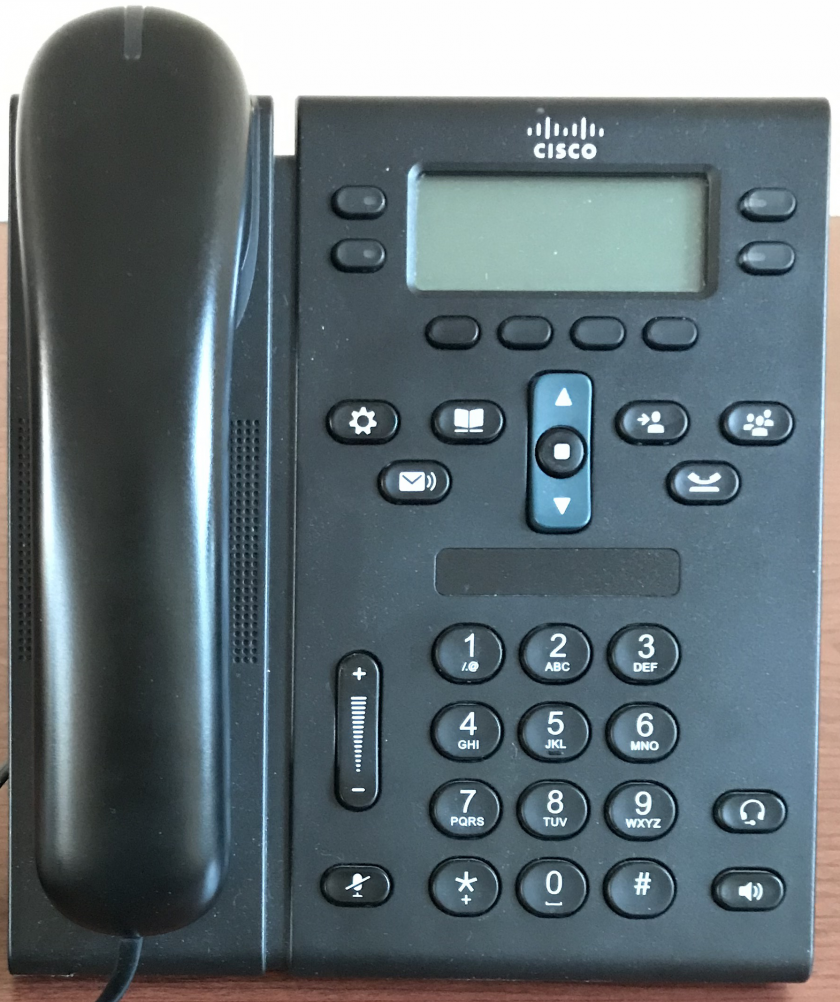 1. Press the button the looks like a gear. 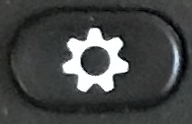 2. **Press 4** and wait for the display to change. 3. **Press 5** and wait for the display to change. 4. Press the second button from the left at the bottom of the display marked **All** (marked in red below). 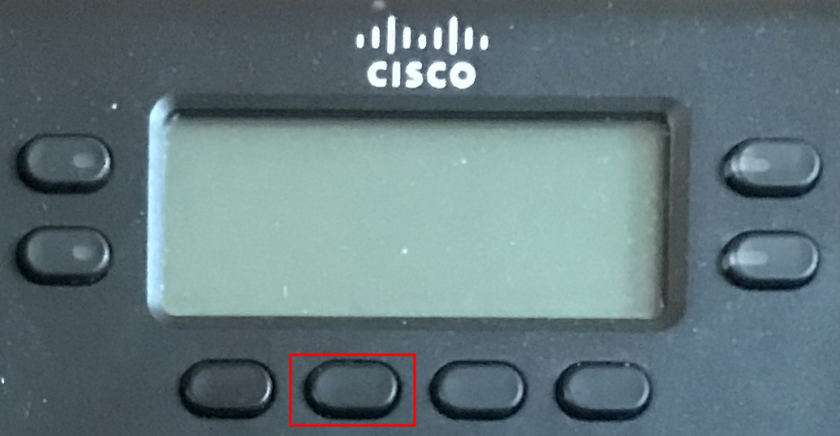 5. The phone will reset and reboot. --- ### Cisco CP-7841 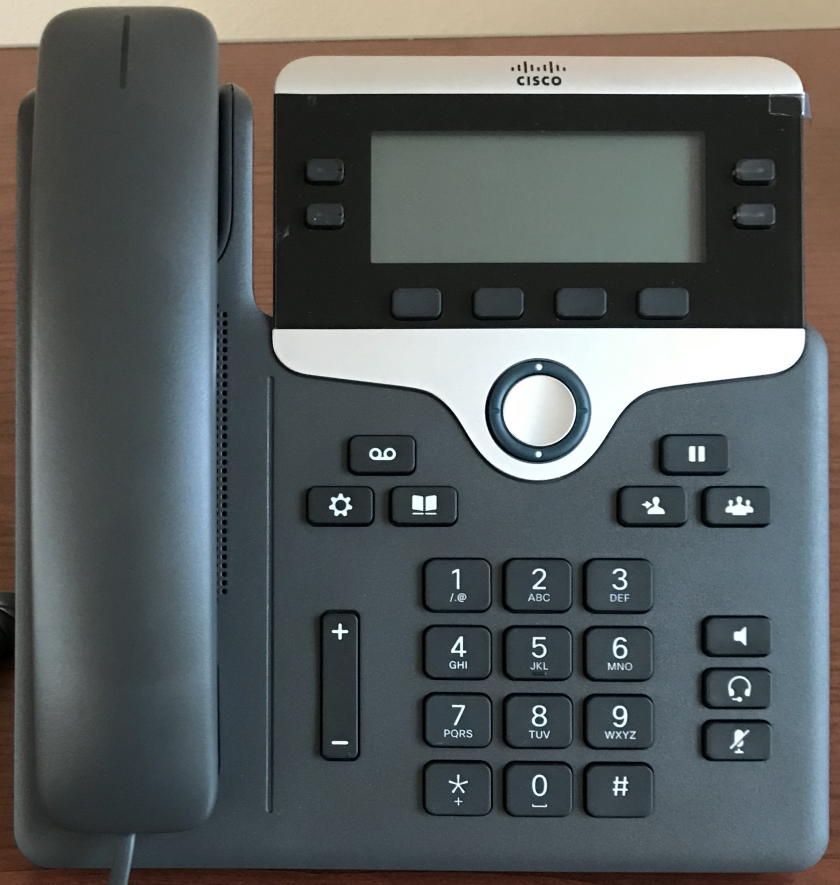 1. Press the button that looks like a **gear**. 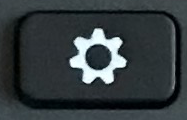 2. **Press 5** and wait for the display to change. 3. **Press 4** and wait for the display to change. 4. **Press 1** and wait for the display to change. 5. Press the second button from the left at the bottom of the display marked **Reset** (marked in red below). 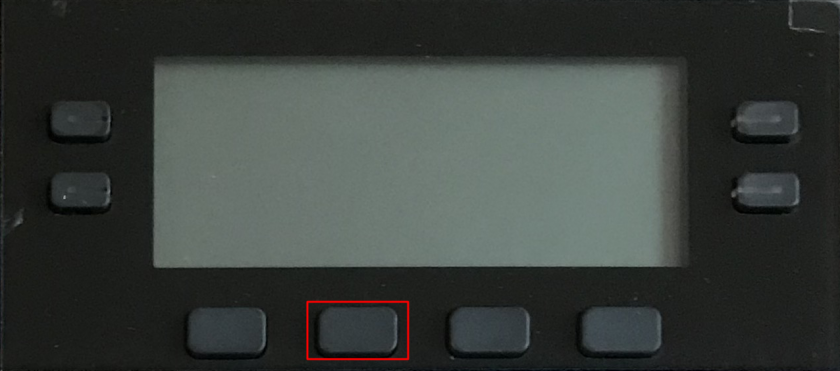 6. The phone will reset and reboot. --- ### Cisco CP-9971 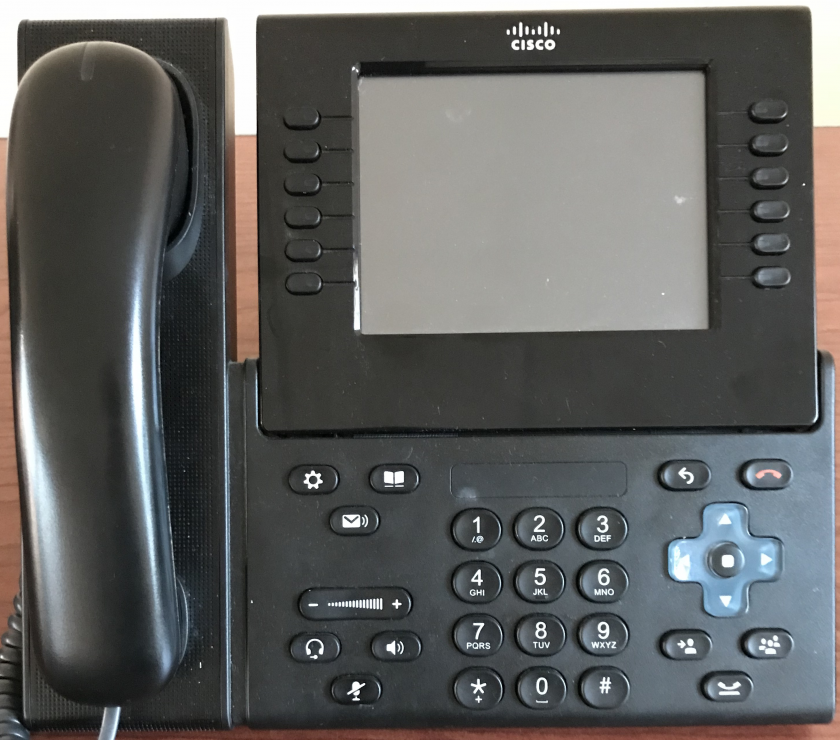 1. Press the button that looks like a **gear**.  2. **Press 4** and wait for the display to change. 3. **Press 4** and wait for the display to change. 4. **Press 2** and wait for the display to change. 5. **Press Reset** on the touchscreen. 6. The phone will reset and reboot. --- ### All Cisco Phones If your phone cannot be reset with the above methods or if the phone does not have a display, this method can be used to reset any phone in any state: 1. Unplug the phone's network cable. It will be the left-most cable when looking at the back of the phone.  2. Plug in the phone and immediately **press and hold #** for 10 seconds 3. Press each button in order: **1-2-3-4-5-6-7-8-9-\*-0-#** 4. The phone will reset and rebootPlease select the your phone from the list below to access the user guide for your phone.
| [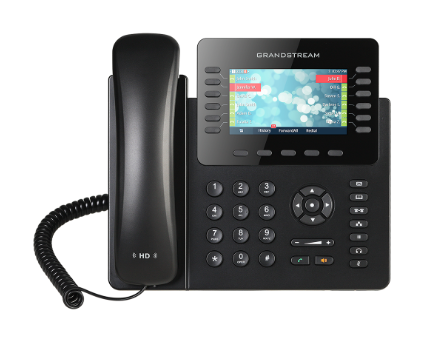](https://kb.princetonisd.net/books/classroom-troubleshooting/page/grandstream-gxp2170-user-guide "Grandstream GXP2170") Grandstream GXP2170 ([User Guide](https://kb.princetonisd.net/books/classroom-troubleshooting/page/grandstream-gxp2170-user-guide)) | [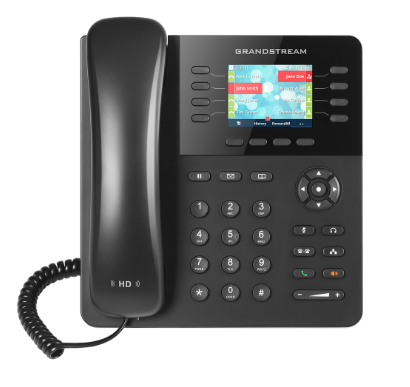](https://kb.princetonisd.net/books/classroom-troubleshooting/page/grandstream-gxp2135-user-guide "Grandstream GXP2135") Grandstream GXP2135 ([User Guide](https://kb.princetonisd.net/books/classroom-troubleshooting/page/grandstream-gxp2135-user-guide)) |
We are currently working on the new phone system, so please check back for updates to the user experience.
If you have trouble or encounter an error with the instructions below, please place a helpdesk ticket, so we can look into the issue. Thank you in advance for your patience!
 ### Calling #### Internal Dialing 1. Enter the extension 2. Pickup the handset to make the call 1. 1. For speaker phone, press the red speaker icon just below the volume up button #### External Dialing 1. Enter the number 10 digit external number 2. Pickup the handset to make the call 1. 1. For speaker phone, press the red speaker icon just below the volume up buttonYou are no longer required to enter a 8 or 1 before the external number.
### Call History 1. Press the button directly below the word *History* on the screen 2. Use the Up and Down arrow buttons around the circle to navigate the call history list 3. Use the Left and Right arrow buttons around the circle to navigate between the different history filters: 1. 1. All Calls 2. Answered Calls 3. Outbound Calls 4. Missed Calls 5. Transferred Calls 4. Press the buttons below the screen text to: 1. 1. Delete a call from the history 2. Clear all call history from the device 3. Dial a number from the call history 5. Press the button under the door icon to return to the main screen 1. 1. The phone will return to the main screen on its own if there's no interaction ### Internal Phone Directory #### Phone Directory Webpage The PISD Phone Directory Webpage is the primary means to search for a person's extension. This webpage is continuously updated, so the information is always accurate. Please refer to this page if you are having trouble reaching a person or room as their extension may have changed. 1. Login to the Classlink Launchpad 2. Select the *PHONE DIRECTORY* application 1. 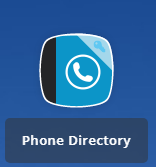 2. Alternatively, you can enter [https://phones.princetonisd.net/staff-directory](https://phones.princetonisd.net/staff-directory) into your web broswer and use the sign-in with Classlink option 3. Select the Campus where you wish to search 1. This will list all the phones and their extensions for the chosen campus 2. You can narrow the results by entering information in the filter fields above each column #### Phone Local Directory The phone contains a local copy of the directory in the event you are unable to access the Phone Directory Webpage. 1. Press the button with the Book icon 1. 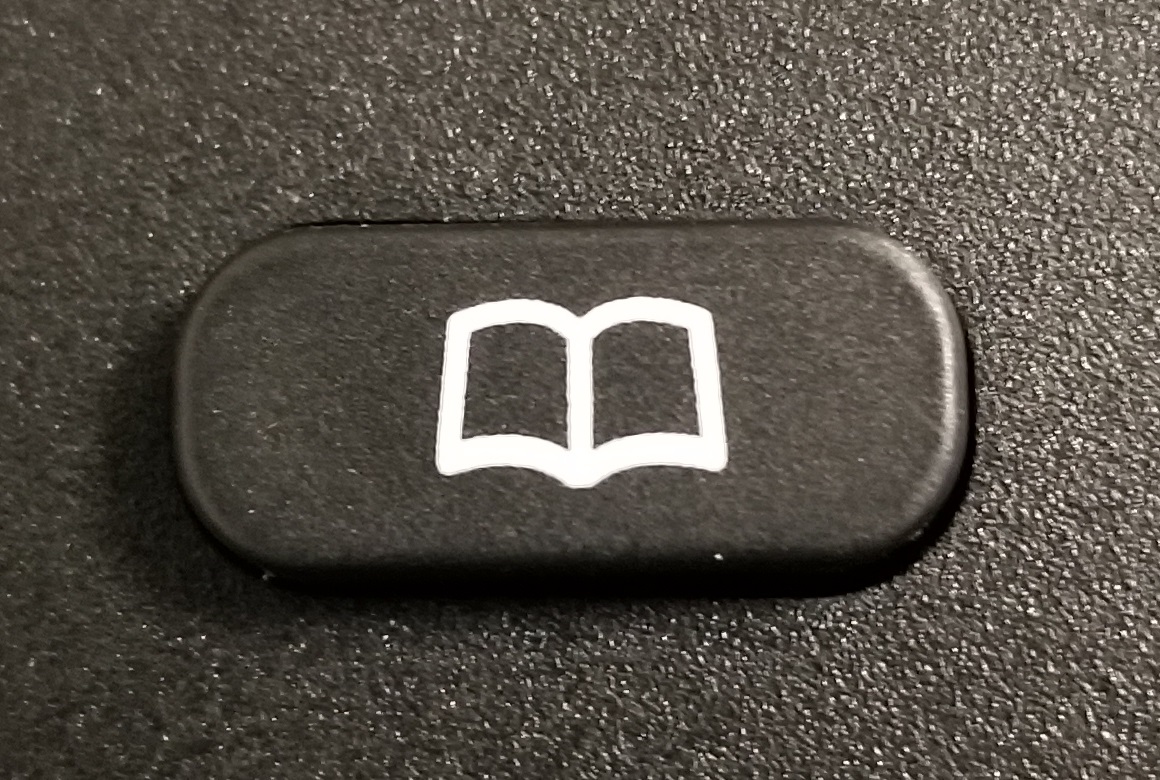 2. Press the Up arrow button in the navigation circle until you enter the Search Field 3. Press the button directly below the phrase *QuickMatch* on the screen 4. Use number keys 2 through 9 to search by name 1. Pressing each number key will cycle through the alphanumeric characters 2. The results will automatically update when a new character has been entered 3. Press the button directly below the phrase *ExactMatch* on the screen to reset the search 5. Use the Up and Down arrow buttons around the circle to navigate the results 6. Navigate to the desired person 7. Press the button directly below the phrase *Dial* on the screen to call them ### Voicemail #### Voicemail Setup 1. Dial \*98 + your extension 1. 1. EX: If your extension is 1234, you will enter \*981234 then place the call 2. Once prompted, enter your passcode followed by # 1. 1. The default passcode is 1000 3. Once prompted, use option 0 to enter the voicemail setup menu 4. Follow the prompts to customize your voicemail #### Checking Voicemail by Email All voicemail messages left by a caller will be emailed to your Princeton ISD email account. The email will be fromEmail is the primary means to access voicemail messages. Most extensions will not have voicemail messages sent to their phone. This section is only for special-use extensions that have the ability to check voicemails through their phone.
1. Dial \*98 2. When you hear the auto-attendant's voice, enter your extension followed by # 3. Once prompted, enter your passcode followed by # 4. Follow the prompts to navigate your voicemail box ### Transferring Calls #### Blind TransferBlind transfer will not give the person at the destination extension any notice they are about to receive a call.
1. Press the button directly below the word *Transfer* on the screen 1. 1. The caller will be placed on hold when the transfer button is pressed 2. Enter the extension that you want to transfer the caller to 3. Press the button directly below the phrase *BlindTrnf* on the screen 4. The caller has now been transferred **Using Contact Buttons on the phone's screen** 1. Press the button directly below the word *Transfer* on the screen 1. 1. The caller will be placed on hold when the transfer button is pressed 2. Press the *BlindTrnf* button 3. Press the button for the contact on your screen 4. The caller has now been transferred #### Attended Transfer 1. Press the button directly below the word *Transfer* on the screen 1. 1. The caller will be placed on hold when the transfer button is pressed 2. Enter the extension that you want to transfer the caller to 3. Press the button directly below the phrase *AttTrnf* on the screen 4. The other extension will need to answer your call 1. 1. If the other extension isn't answering: 1. 1. Press *Cancel* 2. Press *Resume* to take the caller off hold 2. If you get the voicemail for the other extension: 1. 1. Press *Split* 2. Press *End Call* 3. Press *Resume* to take the caller off hold 3. If the other extension answers, but is not able to accept the caller: 1. 1. Press *Split* 2. Press *End Call* 3. Press *Resume* to take the caller off hold 5. Once you are ready to transfer the caller, press the button directly below the word *Transfer* on the screen 6. The caller has now been transferred to the other extension **Using Contact Buttons on the phone's screen** 1. Press the button directly below the word *Transfer* on the screen 1. 1. The caller will be placed on hold when the transfer button is pressed 2. Press the *AttTrnf* button 3. Press the button for the contact on your screen 4. The other extension will need to answer your call 1. 1. If the other extension isn't answering: 1. 1. Press *Cancel* 2. Press *Resume* to take the caller off hold 2. If you get the voicemail for the other extension: 1. 1. Press *Split* 2. Press *End Call* 3. Press *Resume* to take the caller off hold 3. If the other extension answers, but is not able to accept the caller: 1. 1. Press *Split* 2. Press *End Call* 3. Press *Resume* to take the caller off hold 5. Once you are ready to transfer the caller, press the button directly below the word *Transfer* on the screen 6. The caller has now been transferred to the other extension #### Transfer Directly to Voicemail 1. Press the button directly below the word *Transfer* on the screen 1. 1. The caller will be placed on hold when the transfer button is pressed 2. Enter \* + the extension to send the caller to 3. Press the button directly below the phrase *BlindTrnf* on the screen 4. The caller has now been transferred to the voicemail box for that extension **Using Contact Buttons on the phone's screen** 1. Press the button directly below the word *Transfer* on the screen 1. 1. The caller will be placed on hold when the transfer button is pressed 2. Press the *BlindTrnf* button 3. Enter \* 4. Press the button for the contact on your screen 5. The caller has now been transferred to the voicemail box for that extension ### Holding Calls 1. Press the pause button to the right of the volume up and down buttons 1. 1. This will place the caller on hold 2. Press the resume button to continue the callCalls on hold are only held for 5 minutes. Please do not keep calls on hold for an extended period of time.
### Do Not Disturb (DND)DND sends ALL calls straight to voicemail.
DND does not record missed calls in the call history.
Do Not Disturb (DND) mode is used to block all incoming calls. To enable/disable DND, press the mute icon (). While enabled, a red sign with Do Not Disturb text is displayed over the screen. Additionally, DND sends ALL calls sent straight to voicemail, and it does not retain a record of missed calls! To disable DND, press the mute icon again (). ### Forward All Calls #### Enable Call Forwarding 1. Press the button directly below the word *Features* on the screen 2. Navigate to the account with your name 1. 1. This will be Account 1 for most people 2. Use the up and down arrows in the navigation circle to change the selected account 3. Press the center button in the navigation circle 1. 1. This is the circular button surrounded by arrow buttons 4. Navigate to the *Forward All (\*72)* option 5. Press the center button in the navigation circle 6. Enter the number to forward your calls to 1. 1. Enter the number exactly as you would normally dial it to make the call 7. Press the button directly below the word *OK* on the screen 8. The phone should beep and begin forwarding all calls from your extension 1. 1. Call Forwarding is enabled if you see a phone handset icon with a right-pointing arrow in the upper-right corner of the screen #### Disable Call Forwarding 1. Press the button directly below the word *Features* on the screen 2. Navigate to the account with your name 1. 1. This will be Account 1 for most people 2. Use the up and down arrows in the navigation circle to change the selected account 3. Press the center button in the navigation circle 1. 1. This is the circular button surrounded by arrow buttons 4. Navigate to the *Canceled Call Forward Always (\*73)* option 5. Press the center button in the navigation circle 6. The phone should beep and stop forwarding calls 1. 1. Call Forwarding is still enabled if you see a phone handset icon with a right-pointing arrow in the upper-right corner of the screen ### Pairing Bluetooth DevicesIf your campus is looking to purchase a bluetooth device for calling, please have them contact the Technology department for a list of recommended devices.
This phone can be connected to a bluetooth device (such as a headset or ear buds) for hands-free calling. The interoperability of features between the phone and the bluetooth device will vary depending on the bluetooth device being used. This section will show the steps that need to be taken on the phone to pair a bluetooth device. 1. Press the center button in the navigation circle 1. 1. This is the circular button surrounded by arrow buttons 2. Navigate to the *System* icon 1. 1. Use the arrow buttons in the navigation circle to get there 2. When navigating, the selected icon will be brighter than the other icons 3. Press the center button in the navigation circle 4. Navigate to the *Bluetooth* option 5. Press the center button in the navigation circle 1. 1. The Bluetooth screen may take a few seconds before you can navigate on the screen 6. Navigate to the *Start Scan* option 7. Press the button directly below the word *Select* on the screen 8. Place your Bluetooth device into pairing mode 1. 1. Please follow your manufacturer's instructions to do this 9. Press the button directly below the word *Rescan* on the screen 10. Navigate to your Bluetooth device 11. Press the button directly below the word *Pair* on the screen 1. 1. A PIN will appear on the Phone's screen in case your device requires a PIN to connect ### Reset Phone There are several issues that can be resolved by resetting the phone. These instructions will guide you through the process. This is a great way to troubleshoot a phone issue before placing a ticket with the technology helpdesk. 1. Press the center button in the navigation circle 1. 1. This is the circular button surrounded by arrow buttons 2. Navigate to the *System* icon 1. 1. Use the arrow buttons in the navigation circle to get there 2. When navigating, the selected icon will be brighter than the other icons 3. Press the center button in the navigation circle 4. Navigate to the *Factory Reset* option 1. 1. This should be the last option in the list 5. Press the center button in the navigation circle 6. You will be prompted to *Start factory reset now?* 7. Press the button directly below the word *Yes* on the screen 8. The phone will begin to reboot 1. 1. The phone should reboot and return to normal within 2-3 minutes 2. If you're still having issues with your phone, please place a ticket with the technology helpdesk # Grandstream GXP2135 User GuideWe are currently working on the new phone system, so please check back for updates to the user experience.
If you have trouble or encounter an error with the instructions below, please place a helpdesk ticket, so we can look into the issue. Thank you in advance for your patience!
 ### Calling #### Internal Dialing 1. Enter the extension 2. Pickup the handset to make the call 1. 1. For speaker phone, press the red speaker icon just above the volume up button #### External Dialing 1. Enter the number 10 digit external number 2. Pickup the handset to make the call 1. 1. For speaker phone, press the red speaker icon just above the volume up buttonYou are no longer required to enter a 8 or 1 before the external number.
### Call History 1. Press the button directly below the word *History* on the screen 2. Use the Up and Down arrow buttons around the circle to navigate the call history list 3. Use the Left and Right arrow buttons around the circle to navigate between the different history filters: 1. 1. All Calls 2. Answered Calls 3. Outbound Calls 4. Missed Calls 5. Transferred Calls 4. Press the buttons below the screen text to: 1. 1. Delete a call from the history 2. Clear all call history from the device 3. Dial a number from the call history 5. Press the button under the door icon to return to the main screen 1. 1. The phone will return to the main screen on its own if there's no interaction ### Internal Phone Directory #### Phone Directory Webpage The PISD Phone Directory Webpage is the primary means to search for a person's extension. This webpage is continuously updated, so the information is always accurate. Please refer to this page if you are having trouble reaching a person or room as their extension may have changed. 1. Login to the Classlink Launchpad 2. Select the *PHONE DIRECTORY* application 1.  2. Alternatively, you can enter [https://phones.princetonisd.net/staff-directory](https://phones.princetonisd.net/staff-directory) into your web broswer and use the sign-in with Classlink option 3. Select the Campus where you wish to search 1. This will list all the phones and their extensions for the chosen campus 2. You can narrow the results by entering information in the filter fields above each column #### Phone Local Directory The phone contains a local copy of the directory in the event you are unable to access the Phone Directory Webpage. 1. Press the button with the Book icon 1.  2. Press the Up arrow button in the navigation circle until you enter the Search Field 3. Press the button directly below the phrase *Quick* on the screen 4. Use number keys 2 through 9 to search by name 1. Pressing each number key will cycle through the alphanumeric characters 2. The results will automatically update when a new character has been entered 3. Press the button directly below the phrase *Exact* on the screen to reset the search 5. Use the Up and Down arrow buttons around the circle to navigate the results 6. Navigate to the desired person 7. Press the button directly below the phrase *Dial* on the screen to call them ### Voicemail #### Voicemail Setup 1. Dial \*98 + your extension 1. 1. EX: If your extension is 1234, you will enter \*981234 then place the call 2. Once prompted, enter your passcode followed by # 1. 1. The default passcode is 1000 3. Once prompted, use option 0 to enter the voicemail setup menu 4. Follow the prompts to customize your voicemail #### Checking Voicemail by Email All voicemail messages left by a caller will be emailed to your Princeton ISD email account. The email will be fromEmail is the primary means to access voicemail messages. Most extensions will not have voicemail messages sent to their phone. This section is only for special-use extensions that have the ability to check voicemails through their phone.
1. Dial \*98 2. When you hear the auto-attendant's voice, enter your extension followed by # 3. Once prompted, enter your passcode followed by # 4. Follow the prompts to navigate your voicemail box ### Transferring Calls #### Blind TransferBlind transfer will not give the person at the destination extension any notice they are about to receive a call.
1. Press the button directly below the word *Transfer* on the screen 1. 1. The caller will be placed on hold when the transfer button is pressed 2. Enter the extension that you want to transfer the caller to 3. Press the button directly below the phrase *BlindTrnf* on the screen 4. The caller has now been transferred **Using Contact Buttons on the phone's screen** 1. Press the button directly below the word *Transfer* on the screen 1. 1. The caller will be placed on hold when the transfer button is pressed 2. Press the *BlindTrnf* button 3. Press the button for the contact on your screen 4. The caller has now been transferred #### Attended Transfer 1. Press the button directly below the word *Transfer* on the screen 1. 1. The caller will be placed on hold when the transfer button is pressed 2. Enter the extension that you want to transfer the caller to 3. Press the button directly below the phrase *AttTrnf* on the screen 4. The other extension will need to answer your call 1. 1. If the other extension isn't answering: 1. 1. Press *Cancel* 2. Press *Resume* to take the caller off hold 2. If you get the voicemail for the other extension: 1. 1. Press *Split* 2. Press *End Call* 3. Press *Resume* to take the caller off hold 3. If the other extension answers, but is not able to accept the caller: 1. 1. Press *Split* 2. Press *End Call* 3. Press *Resume* to take the caller off hold 5. Once you are ready to transfer the caller, press the button directly below the word *Transfer* on the screen 6. The caller has now been transferred to the other extension **Using Contact Buttons on the phone's screen** 1. Press the button directly below the word *Transfer* on the screen 1. 1. The caller will be placed on hold when the transfer button is pressed 2. Press the *AttTrnf* button 3. Press the button for the contact on your screen 4. The other extension will need to answer your call 1. 1. If the other extension isn't answering: 1. 1. Press *Cancel* 2. Press *Resume* to take the caller off hold 2. If you get the voicemail for the other extension: 1. 1. Press *Split* 2. Press *End Call* 3. Press *Resume* to take the caller off hold 3. If the other extension answers, but is not able to accept the caller: 1. 1. Press *Split* 2. Press *End Call* 3. Press *Resume* to take the caller off hold 5. Once you are ready to transfer the caller, press the button directly below the word *Transfer* on the screen 6. The caller has now been transferred to the other extension #### Transfer Directly to Voicemail 1. Press the button directly below the word *Transfer* on the screen 1. 1. The caller will be placed on hold when the transfer button is pressed 2. Enter \* + the extension to send the caller to 3. Press the button directly below the phrase *BlindTrnf* on the screen 4. The caller has now been transferred to the voicemail box for that extension **Using Contact Buttons on the phone's screen** 1. Press the button directly below the word *Transfer* on the screen 1. 1. The caller will be placed on hold when the transfer button is pressed 2. Press the *BlindTrnf* button 3. Enter \* 4. Press the button for the contact on your screen 5. The caller has now been transferred to the voicemail box for that extension ### Holding Calls 1. Press the pause button directly above the number 1 1. 1. This will place the caller on hold 2. Press the resume button to continue the callCalls on hold are only held for 5 minutes. Please do not keep calls on hold for an extended period of time.
### Do Not Disturb (DND)DND sends ALL calls straight to voicemail.
DND does not record missed calls in the call history.
Do Not Disturb (DND) mode is used to block all incoming calls. To enable/disable DND, press the mute icon (). While enabled, a red sign with Do Not Disturb text is displayed over the screen. Additionally, DND sends ALL calls sent straight to voicemail, and it does not retain a record of missed calls! To disable DND, press the mute icon again (). ### Forward All Calls #### Enable Call Forwarding 1. Press the button directly below the word *Features* on the screen 2. Navigate to the account with your name 1. 1. This will be Account 1 for most people 2. Use the up and down arrows in the navigation circle to change the selected account 3. Press the center button in the navigation circle 1. 1. This is the circular button surrounded by arrow buttons 4. Navigate to the *Forward All (\*72)* option 5. Press the center button in the navigation circle 6. Enter the number to forward your calls to 1. 1. Enter the number exactly as you would normally dial it to make the call 7. Press the button directly below the word *OK* on the screen 8. The phone should beep and begin forwarding all calls from your extension 1. 1. Call Forwarding is enabled if you see a phone handset icon with a right-pointing arrow in the upper-right corner of the screen #### Disable Call Forwarding 1. Press the button directly below the word *Features* on the screen 2. Navigate to the account with your name 1. 1. This will be Account 1 for most people 2. Use the up and down arrows in the navigation circle to change the selected account 3. Press the center button in the navigation circle 1. 1. This is the circular button surrounded by arrow buttons 4. Navigate to the *Canceled Call Forward Always (\*73)* option 5. Press the center button in the navigation circle 6. The phone should beep and stop forwarding calls 1. 1. Call Forwarding is still enabled if you see a phone handset icon with a right-pointing arrow in the upper-right corner of the screen ### Pairing Bluetooth DevicesIf your campus is looking to purchase a bluetooth device for calling, please have them contact the Technology department for a list of recommended devices.
This phone can be connected to a bluetooth device (such as a headset or ear buds) for hands-free calling. The interoperability of features between the phone and the bluetooth device will vary depending on the bluetooth device being used. This section will show the steps that need to be taken on the phone to pair a bluetooth device. 1. Press the center button in the navigation circle 1. 1. This is the circular button surrounded by arrow buttons 2. Navigate to the *System* icon 1. 1. Press the right arrow button 3 times to get there 2. When navigating, the selected icon will be brighter than the other icons 3. Press the center button in the navigation circle 4. Navigate to the *Bluetooth* option 5. Press the center button in the navigation circle 1. 1. The Bluetooth screen may take a few seconds before you can navigate on the screen 6. Navigate to the *Start Scan* option 7. Press the button directly below the word *Select* on the screen 8. Place your Bluetooth device into pairing mode 1. 1. Please follow your manufacturer's instructions to do this 9. Press the button directly below the word *Rescan* on the screen 10. Navigate to your Bluetooth device 11. Press the button directly below the word *Pair* on the screen 1. 1. A PIN will appear on the Phone's screen in case your device requires a PIN to connect ### Reset Phone There are several issues that can be resolved by resetting the phone. These instructions will guide you through the process. This is a great way to troubleshoot a phone issue before placing a ticket with the technology helpdesk. 1. Press the center button in the navigation circle 1. 1. This is the circular button surrounded by arrow buttons 2. Navigate to the *System* icon 1. 1. Press the right arrow button 3 times to get there 2. When navigating, the selected icon will be brighter than the other icons 3. Press the center button in the navigation circle 4. Navigate to the *Factory Reset* option 1. 1. Use the up and down arrow buttons in the navigation circle 2. This should be the last option in the list 5. Press the center button in the navigation circle 6. You will be prompted to *Start factory reset now?* 7. Press the button directly below the word *Yes* on the screen 8. The phone will begin to reboot 1. 1. The phone should reboot and return to normal within 2-3 minutes 2. If you're still having issues with your phone, please place a ticket with the technology helpdesk # Campus Phone ManagementThis page is intended for campus phone administrators ONLY. The guides laid out below will not work if you do not have the rights to manage phones.
### Logging In 1. Login to the Classlink Launchpad 2. Select the *PHONE DIRECTORY* application 1.  2. Alternatively, you can enter [https://phones.princetonisd.net/staff-directory](https://phones.princetonisd.net/staff-directory) into your web broswer and use the sign-in with Classlink option ### User Management The user management section of the Phone Directory application allows you to manage Extensions and Public Aliases for your users. 1. Log in the the **Phone Directory** 2. Select the ***Manage Users*** tab 3. Select the **pencil icon** to the right of a user to edit their account 4. From here you can assign a direct extension or a public alias - The **Direct Extension** is the extension you dial to reach the person - The **Public Alias** is the extension that others will see in the directory (EG: The person's secretary). Most people don't need a Public Alias. 5. Select the blue save icon to apply any changes - To discard any changes, refresh the page **WITHOUT** selecting the save icon #### Caveats - Users who's home campus is different from your campus will not be editable by you. If you believe that a user should be at your campus, use the blue **Request Missing Staff Member** button to request them. - Assigning an extension that is already in use will cause the previous owner of that extension to no longer have an extension. - Users must have an extension assigned to be reachable. ### Phone Management 1. Log in the the Phone Directory 2. Select the ***Manage Phones*** tab 3. Select the pencil icon to the right of a phone to edit its assignments 4. From here you can assign users to a phone and mark it has their primary phone - Users may have only one primary phone. Assigning multiple primary phones to a user can cause problems with 911 service. - Users with a home campus that is different from the phone's campus cannot be designated as primary. 5. Select the blue save icon to apply any changes - To discard any changes, refresh the page **WITHOUT** selecting the save icon #### Phone Identification When making changes to a phone, it is important to identify the correct phone that you are making changes to. There are two main ways to identify a phone: Location and PISD barcode. The *ROOM* column is the location where the phone is inventoried to. Some rooms may have multiple phones, so the information under the *PHONE* column can be used to find a specific device. The *PHONE* column will typically contain the 5-digit PISD barcode which is usually found on the back of the phone. As a last resort, the MAC Address can be used to identify the phone. The MAC Address will usually be located on the lower back of the phone.If you ever have trouble finding a phone or if a phone is listed in the wrong location, please place a [helpdesk](https://www.schoolobjects.com/STSS) ticket.
#### Phone Lines Whenever a user is assigned to a phone, it uses up a phone line. Each model of phone has a limit to how many lines can be assigned; this amount is different than the number of buttons on the phone's screen. The phone will assign the users in order until the maximum number of lines has been reached. #### Speed Dial Speed dials can be configured by the staff member themselves via the My Speed Dial page. They can also be configured for campus users by the phone admin via the Speed Dial button that appears to the right of each users on the Manage Users page. Speed dial entries are assigned to a phone based on the users assigned to the phone. If multiple users are assigned to a phone, the speed dial entries of each user will be assigned in the same order as the users are assigned to the phone. # Printer # Brother HL-L2300D Toner Reset The Brother HL-L2300D printer may report low toner when there is still toner left in the cartridge. This error will not always be resolved by replacing the toner. Complete the following steps to reset the toner counter. 1. **Press** and **Hold** the **Power** button until the machine turns off 2. **Open** the **Toner Door** 3. **Press** and **Hold** the **Go** button until **step 5** 4. **Press** the **Power** button 5. **Release** the **Go** button when the **Toner**, **Paper**, and **Drum** lights are lit 6. **Press** the **Go** button **9 times** 7. **Wait** for the **Toner**, **Paper**, and **Drum** lights to be lit 8. **Press** the **Go** button **5 times** 9. **Close** the **Toner Door** # Software # Playing DVDs with VLC ### Summary At this time, we recommend using the **VLC media player** to play all video and DVD content. If a DVD offers to use or install any additional software, such as the InterActual or Real player, **please do not run or install these as they are apt to cause playback issues.** ### Directions **1.** Insert your DVD. If your computer asks how to play this dvd, click the banner and select **VLC media player** [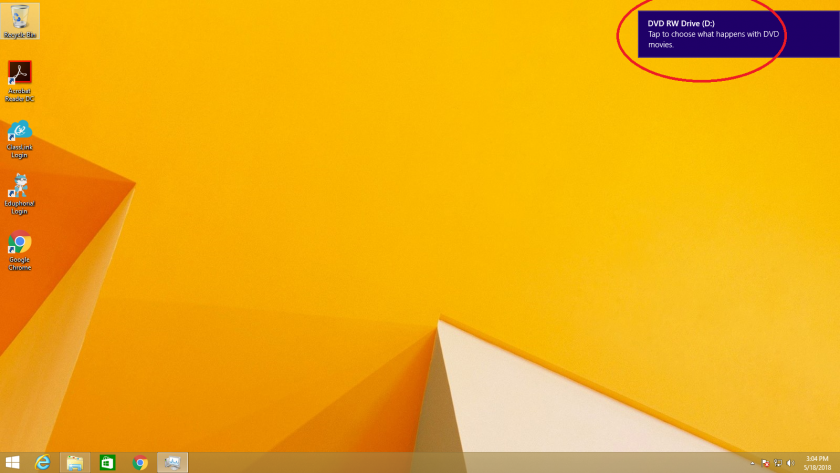](https://kb.princetonisd.net/uploads/images/gallery/2018-05-May/dvdOptions_circled.png)[ 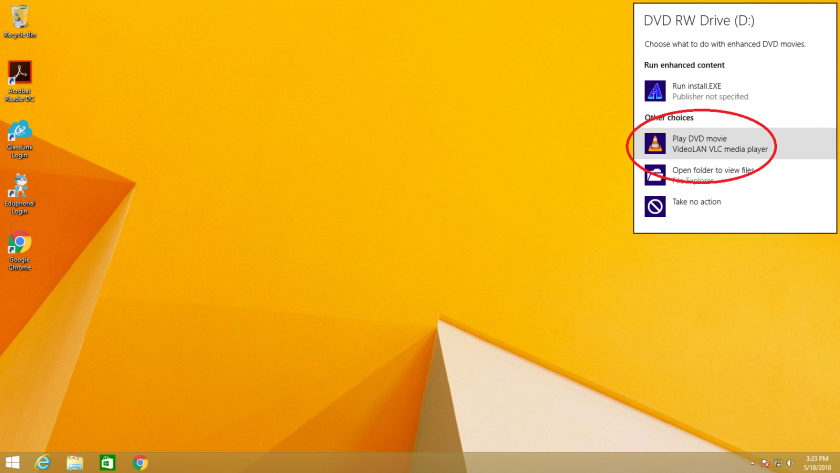](https://kb.princetonisd.net/uploads/images/gallery/2018-05-May/dvdDefaults_circled.png) **2.** If your computer does not ask how to open and does not open VLC media player, you will need to manually open VLC and play the DVD. Click the start button and search for VLC. Click **VLC media player**. 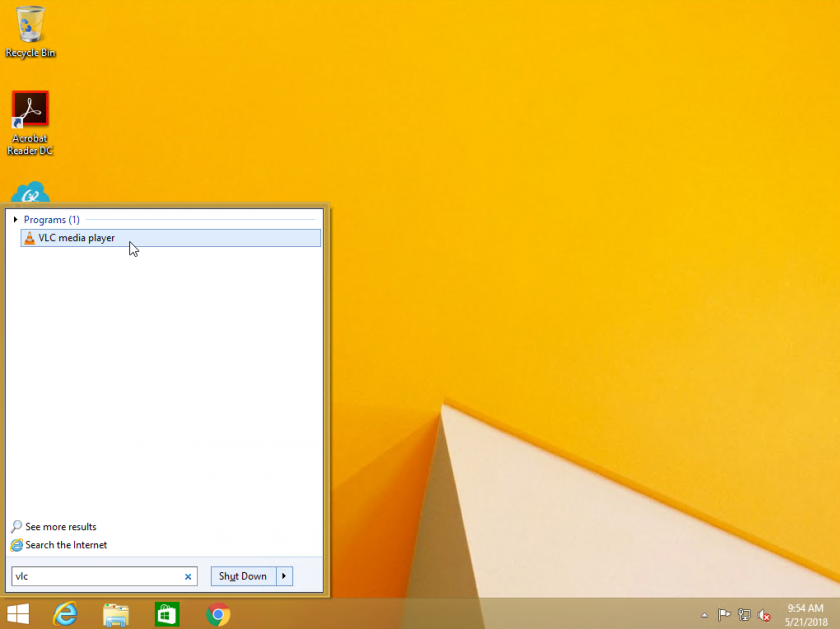 **3.** Once VLC is open, click the **Media** button in the top left and then click **Open Disc...** . When the Open Media window appears, ensure that your DVD is selected on the **Disc Device** menu and then click **Play** at the bottom. VLC will now start to read and play your DVD. [ 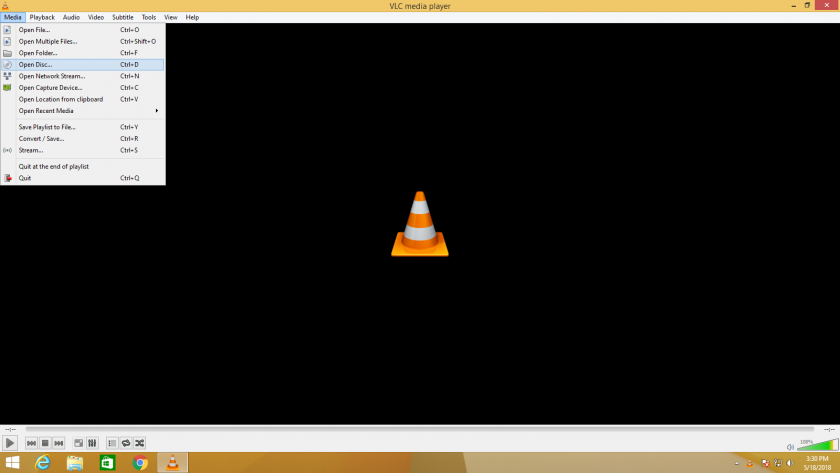](https://kb.princetonisd.net/uploads/images/gallery/2018-05-May/openDisc.png) [ 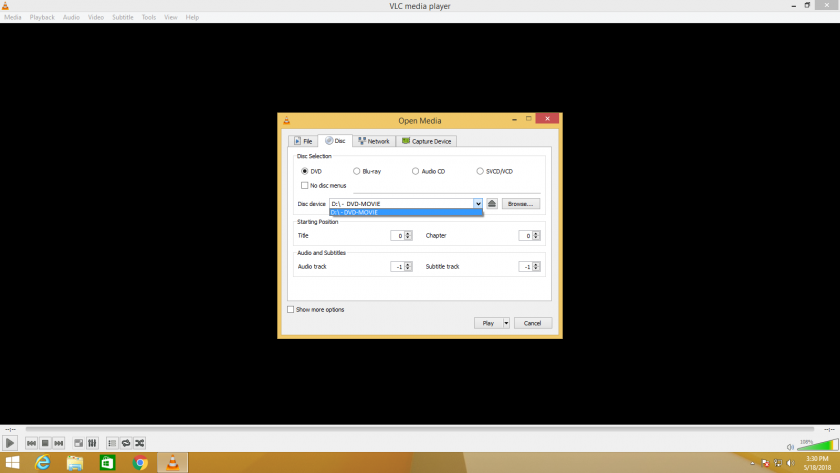](https://kb.princetonisd.net/uploads/images/gallery/2018-05-May/SelectDVD.png) ### Troubleshooting **1.** **Allow your computer one minute to decode the DVD.** Disney DVDs and other big picture movies are stored on the DVD in an encoded format to prevent piracy. Decoding a movie to play it is a CPU intensive process that may take some time. Please allow your computer up to a minute to decode the disk before it starts playing. **2**. **Close other running software.** To help your computer decode the DVD faster, please ensure other programs are closed when playing DVDs. The process is very CPU intensive and running other programs such as Chrome can slow down the decoding process. **3.** **Check your dvd for smudges and scratches.** A quick wipe with a glasses cleaning cloth can remove most smudges and defects that will prevent a DVD player from reading your DVD **4. Submit a Helpdesk ticket.** Please let us know if a DVD is still unable to play after trying these steps. We want to hear about issues like this to help prevent classroom delays and interruptions. All requests for help playing a DVD should be entered into [Eduphoria](https://princeton.schoolobjects.com/ "Eduphoria Helpdesk") so that your campus tech can help fix the issue.