
Two-Factor Authentication
What is Two-Factor Authentication?
Two-factor authentication (sometimes referred to as "2FA", "multi-factor authentication", or "MFA") is an additional layer of security that can be applied to many modern web-based accounts. It comes in many different forms, but they all perform the same function.
When you attempt to log in with a 2FA-enabled account on a new device, you are prompted to enter the usual username-password combination, but are then prompted to enter a verification code from whichever authentication method(s) you have set up. These methods for providing codes typically depend on having your cell phone with you.
By adding these codes to the sign-in process, this prevents any unauthorized users from accessing your account without your knowledge even if they have your password.
If you have signed into a device before using 2FA, you will not be prompted to enter a verification code again, unless you have had your password reset. You will need to enter a verification code while signing in if you are attempting to sign in on a new device or web browser as well.
Forms of Two-Factor Authentication
Mobile Authenticator App
You may get a phone application on IOS and Android devices that provide the verification code. These codes are time-sensitive, and are only valid while they appear onscreen in your app. These time-sensitive codes prevent unauthorized users from logging into your account by resetting the codes every 30 seconds.
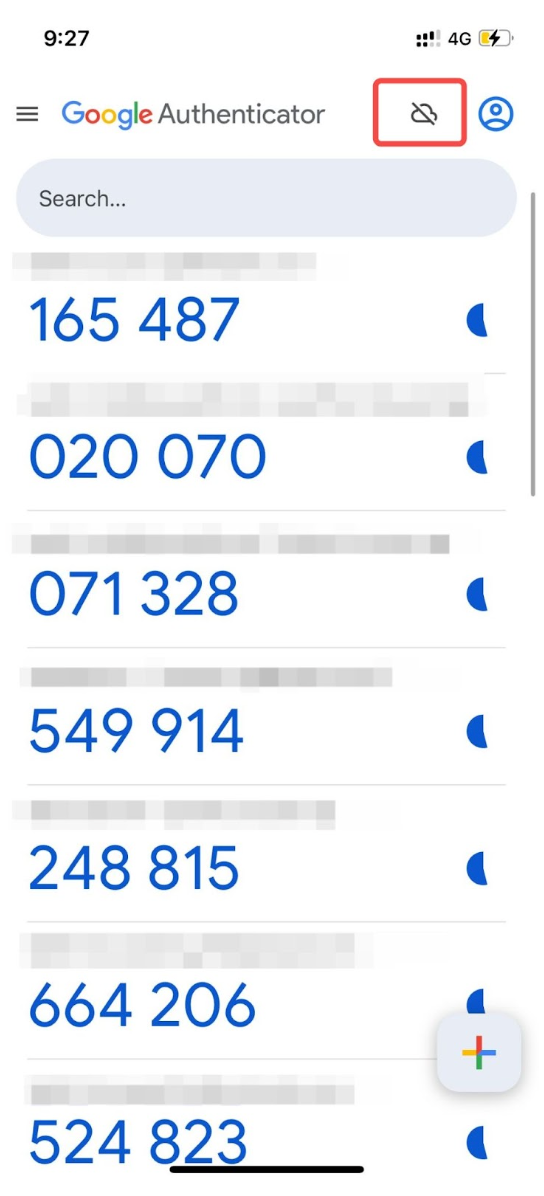
An example of what the authenticator app looks like is shown below. Each code is associated with a different account, which may be Classlink, email, banking, Amazon, etc. Notice the timer wheel to the right of each code, which shows you how much longer that code is valid for. Do not feel pressured to enter the code before that timer completes. Sometimes it is necessary to wait until a new code appears, allowing you plenty of time to enter the new code.
Text Message
You may also receive a text message containing a time sensitive code as well. This prevents you from needing to download another application, but these codes usually stay valid for much longer. Text message and data rates may apply. While this method is still quite secure, it is less secure than the authenticator option, since the codes stay valid for much longer, and may be bypassed more easily.
Once the code is sent to your phone, you will be able to enter it on your device to finish the sign-in process. Once logged in, it is recommended to delete the text message.
Image Selection
This final option is the least secure of the three presented here. You will select an image which you must remember, and then will need to select the correct image upon signing in to verify it is you.
While it is very simple to use, it is much more susceptible to random guessing, and so we only recommend using this option if you do not have a cell phone.
How to set up 2FA
Login to ClassLink
First things first! You will need to be logged in to ClassLink to begin.
Go to Security Settings
Secondly, follow the images below to get to the security settings window.
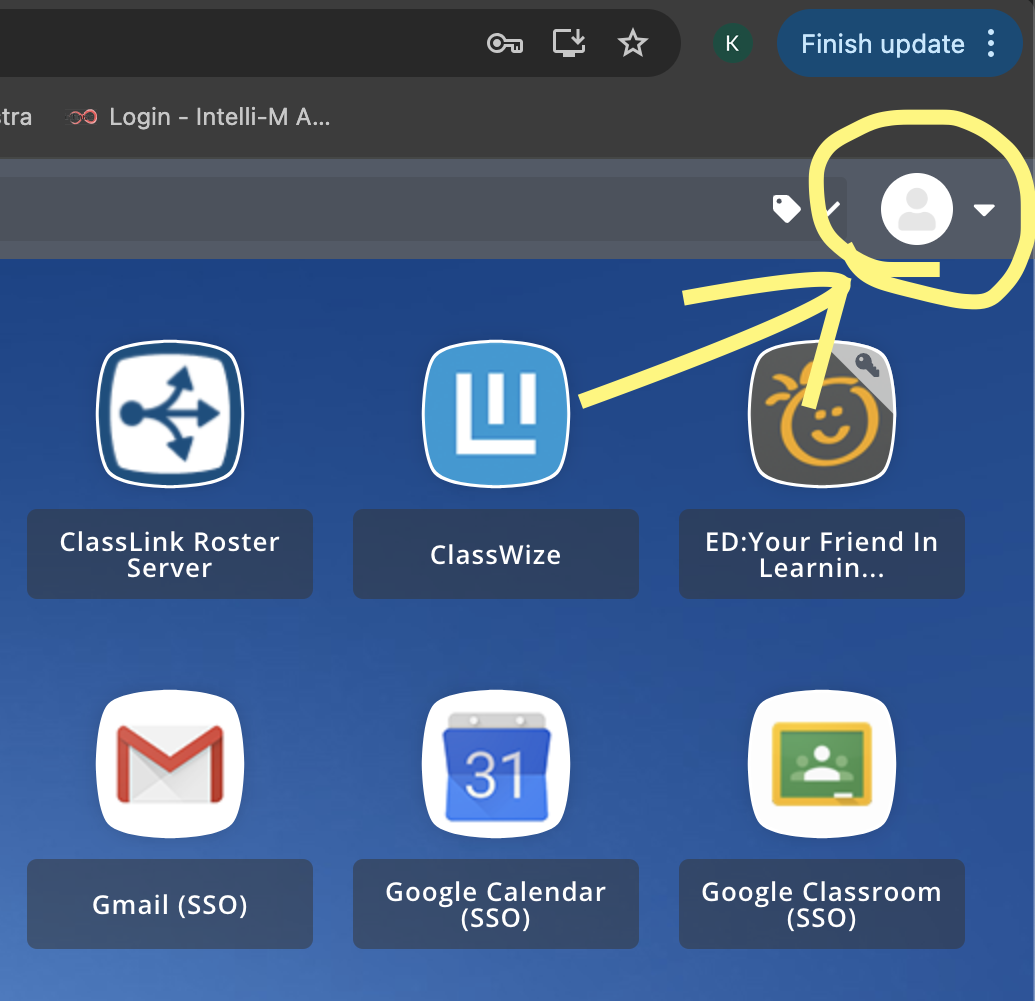
In the top right of your ClassLink homepage, click on your profile icon
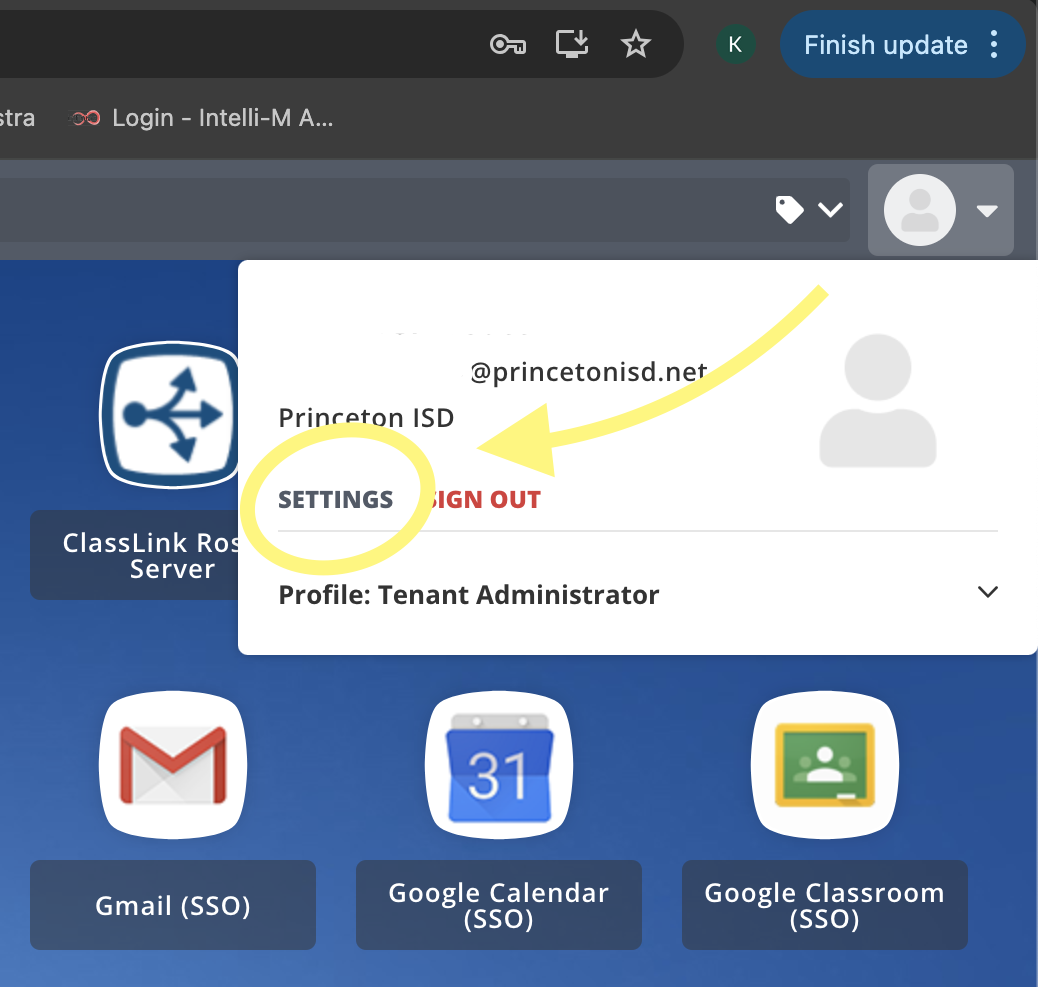
Next, click on "Settings"
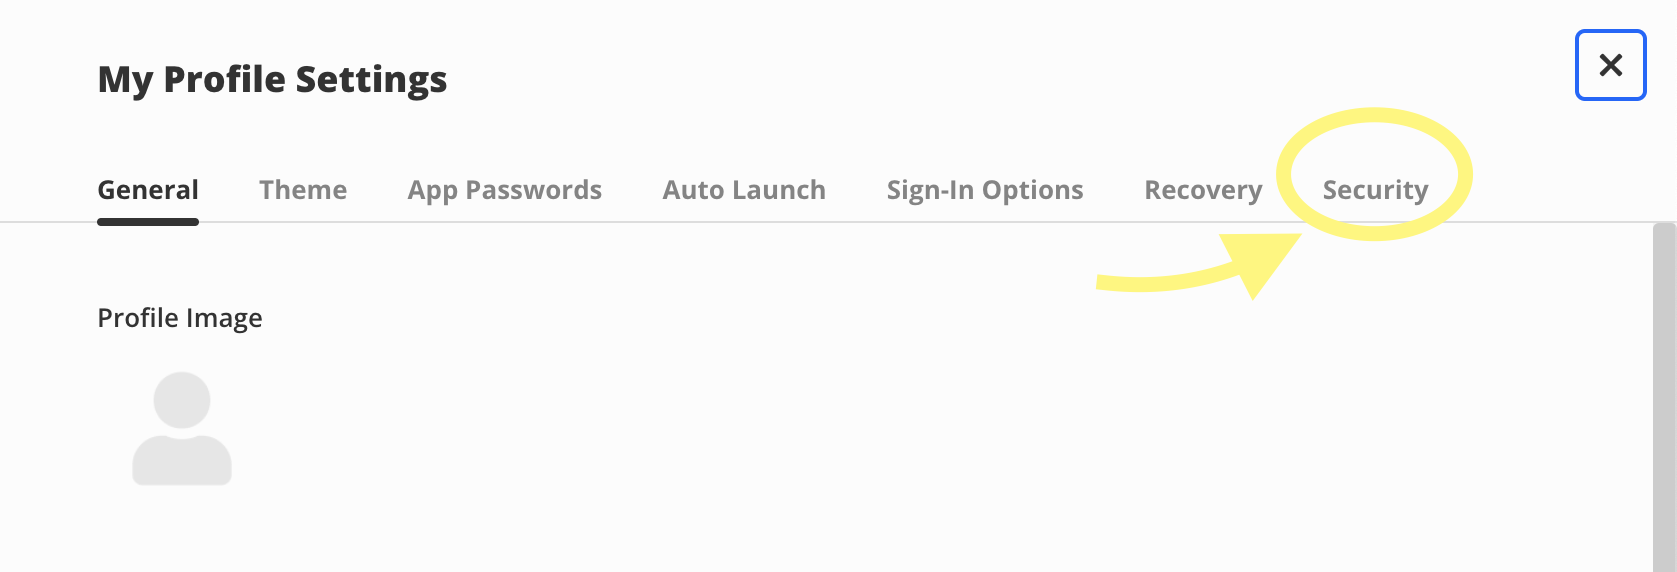
After that, a new window will appear extending form the right of the screen. Click on "Security".
Finally, you should see this window. Before you click on anything else, proceed to the next section.
 Select a method
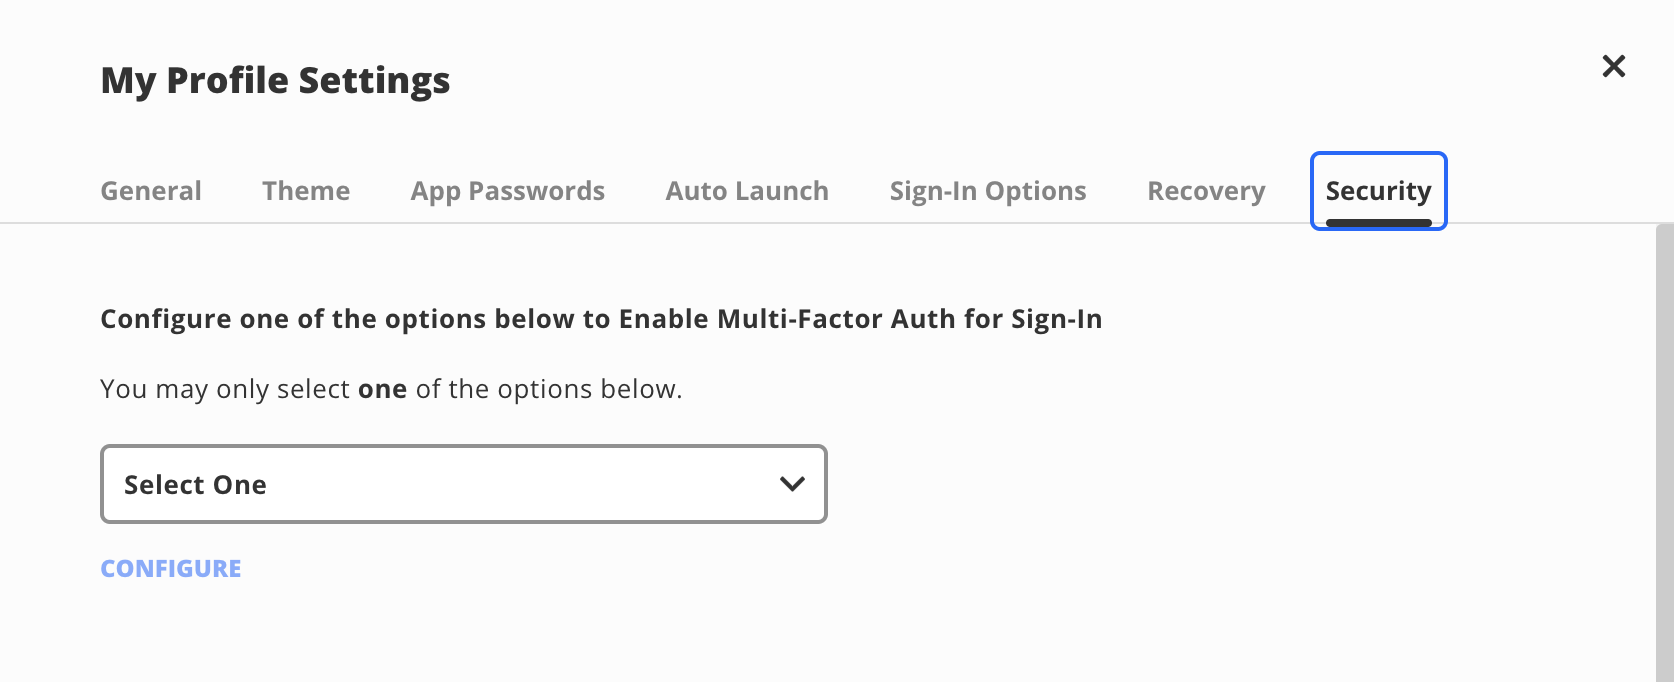
Before proceeding, you will need to select your preferred method of 2FA. Below are the available options for Classlink, and are presented in order of strongest security (top) to weakest security (bottom):
- Mobile Authenticator app (Strongest)
- Text message
- Image selection (Weakest)
Once you have made a selection, proceed to the steps below associated with that 2FA method.
Mobile Authenticator App
For authenticator apps, there are two options we suggest (both of which are free):
- Google Authenticator (if you have a personal Google account already)
- Twilio Authy
Search for whichever you prefer in the App Store (iPhone) or Play Store (Android) on your device, and download them.
Once downloaded, you will need to sign in:
- For Google Authenticator, log in with your personal gmail account information. DO NOT attempt to log in with your work email.
- For Twilio Authy, you will need to follow the instructions in the app for linking your phone number to the app.
After logging in to your authenticator app, we will briefly go back to ClassLink.
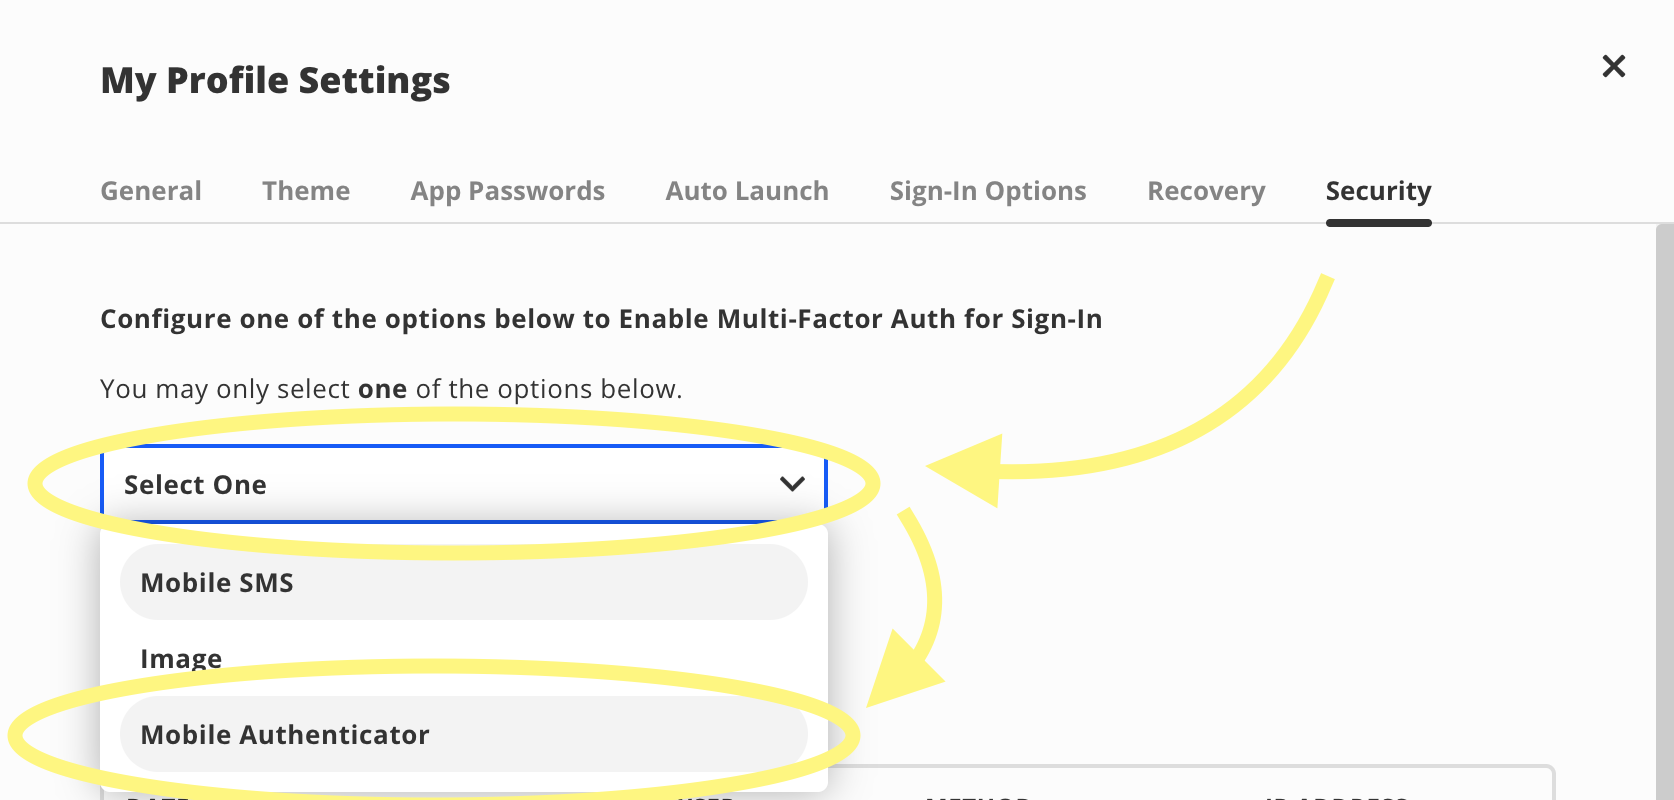
Click on the "Select One" dropdown menu, and select "Mobile Authenticator".
This should pull up a new window with a QR code.
Now return to your authenticator app and locate the + button.
- Google authenticator: a rainbow-colored + button at the bottom of the app's screen
- Twilio Authy: a + button with "Add Account" in the middle of the app's screen
Select the appropriate button for scanning a QR code. This will open your camera.
Scan the QR code in your Classlink page with the app, which should add a new code to your app.
Finally, enter the new code from your authenticator app at the bottom of the Classlink page, then click the green "Save" button at the bottom of the screen.
After the page updates, make sure you see a blue "Enabled" next to the "Mobile Authenticator" option. If it says "Disabled", click the blue "Re-enable" button below.
You're all set! You may be asked to enter a code from your authenticator app next time you log in.
Text Message
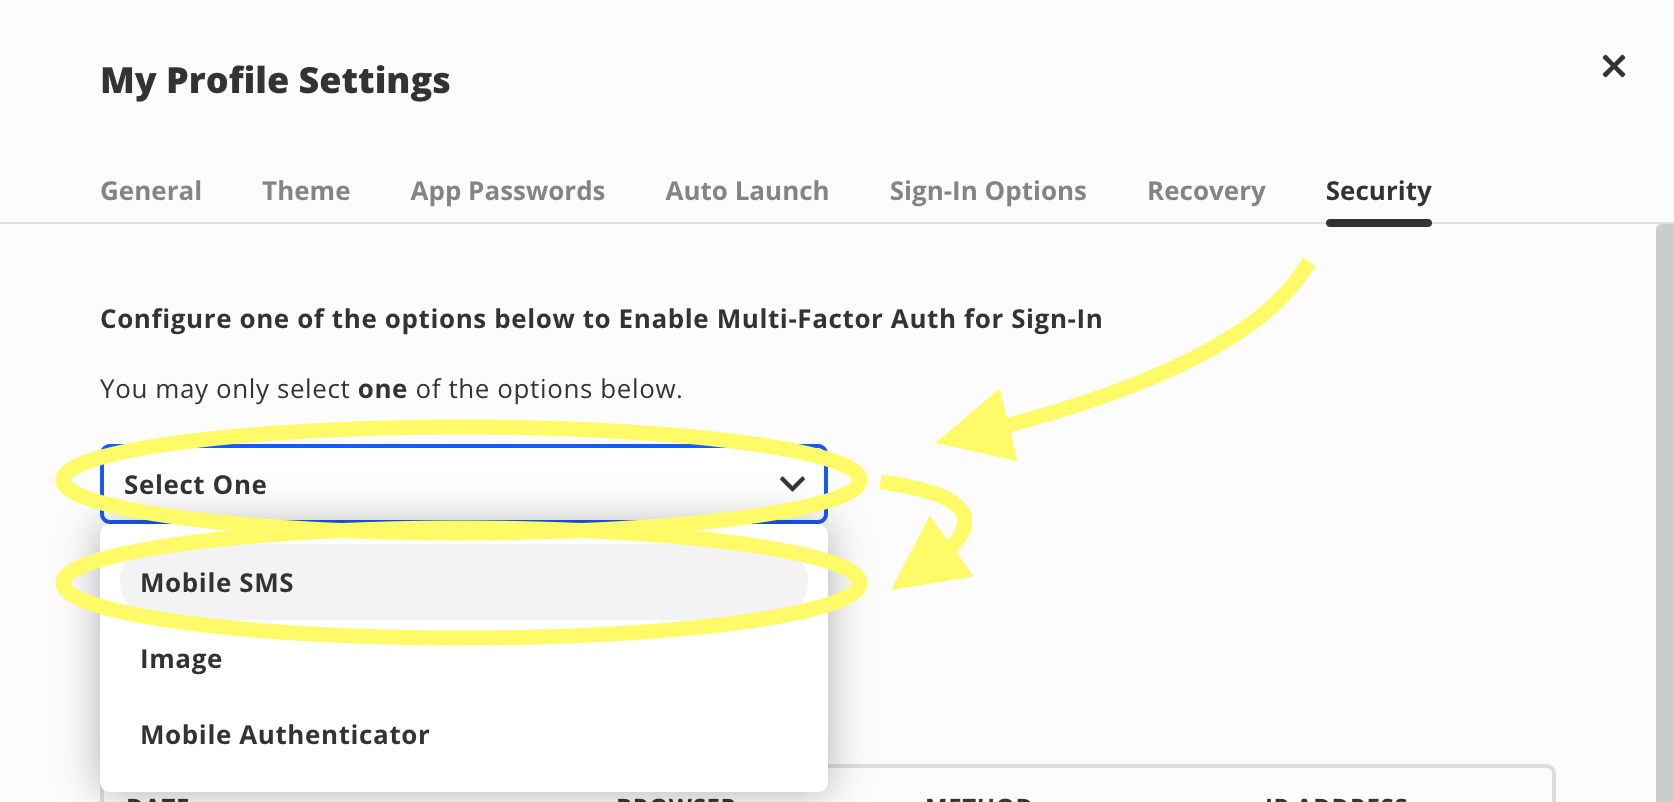
On your Classlink page, click the "Select One" dropdown menu, then select "Mobile SMS".
You will then be prompted to enter your phone number in Classlink. Then click the green "Save" button at the bottom of the screen.
After doing so, you will be asked to enter a verification code that is sent to your phone via text message. If you do not receive the text message within 1 minute, click the blue "RESEND CODE" above your phone number.
After entering the verification code that has been texted to you, click "Submit" on the right.
Once the page updates, make sure you see a blue "Enabled" next to the "Mobile SMS" option. If it says "Disabled", click the blue "Re-enable" button below.
You're all set! You may be asked to enter a text message code next time you log in.
Image Selection
On you Classlink page, click the "Select One" dropdown menu, then select "Image".
You should see the following screen.
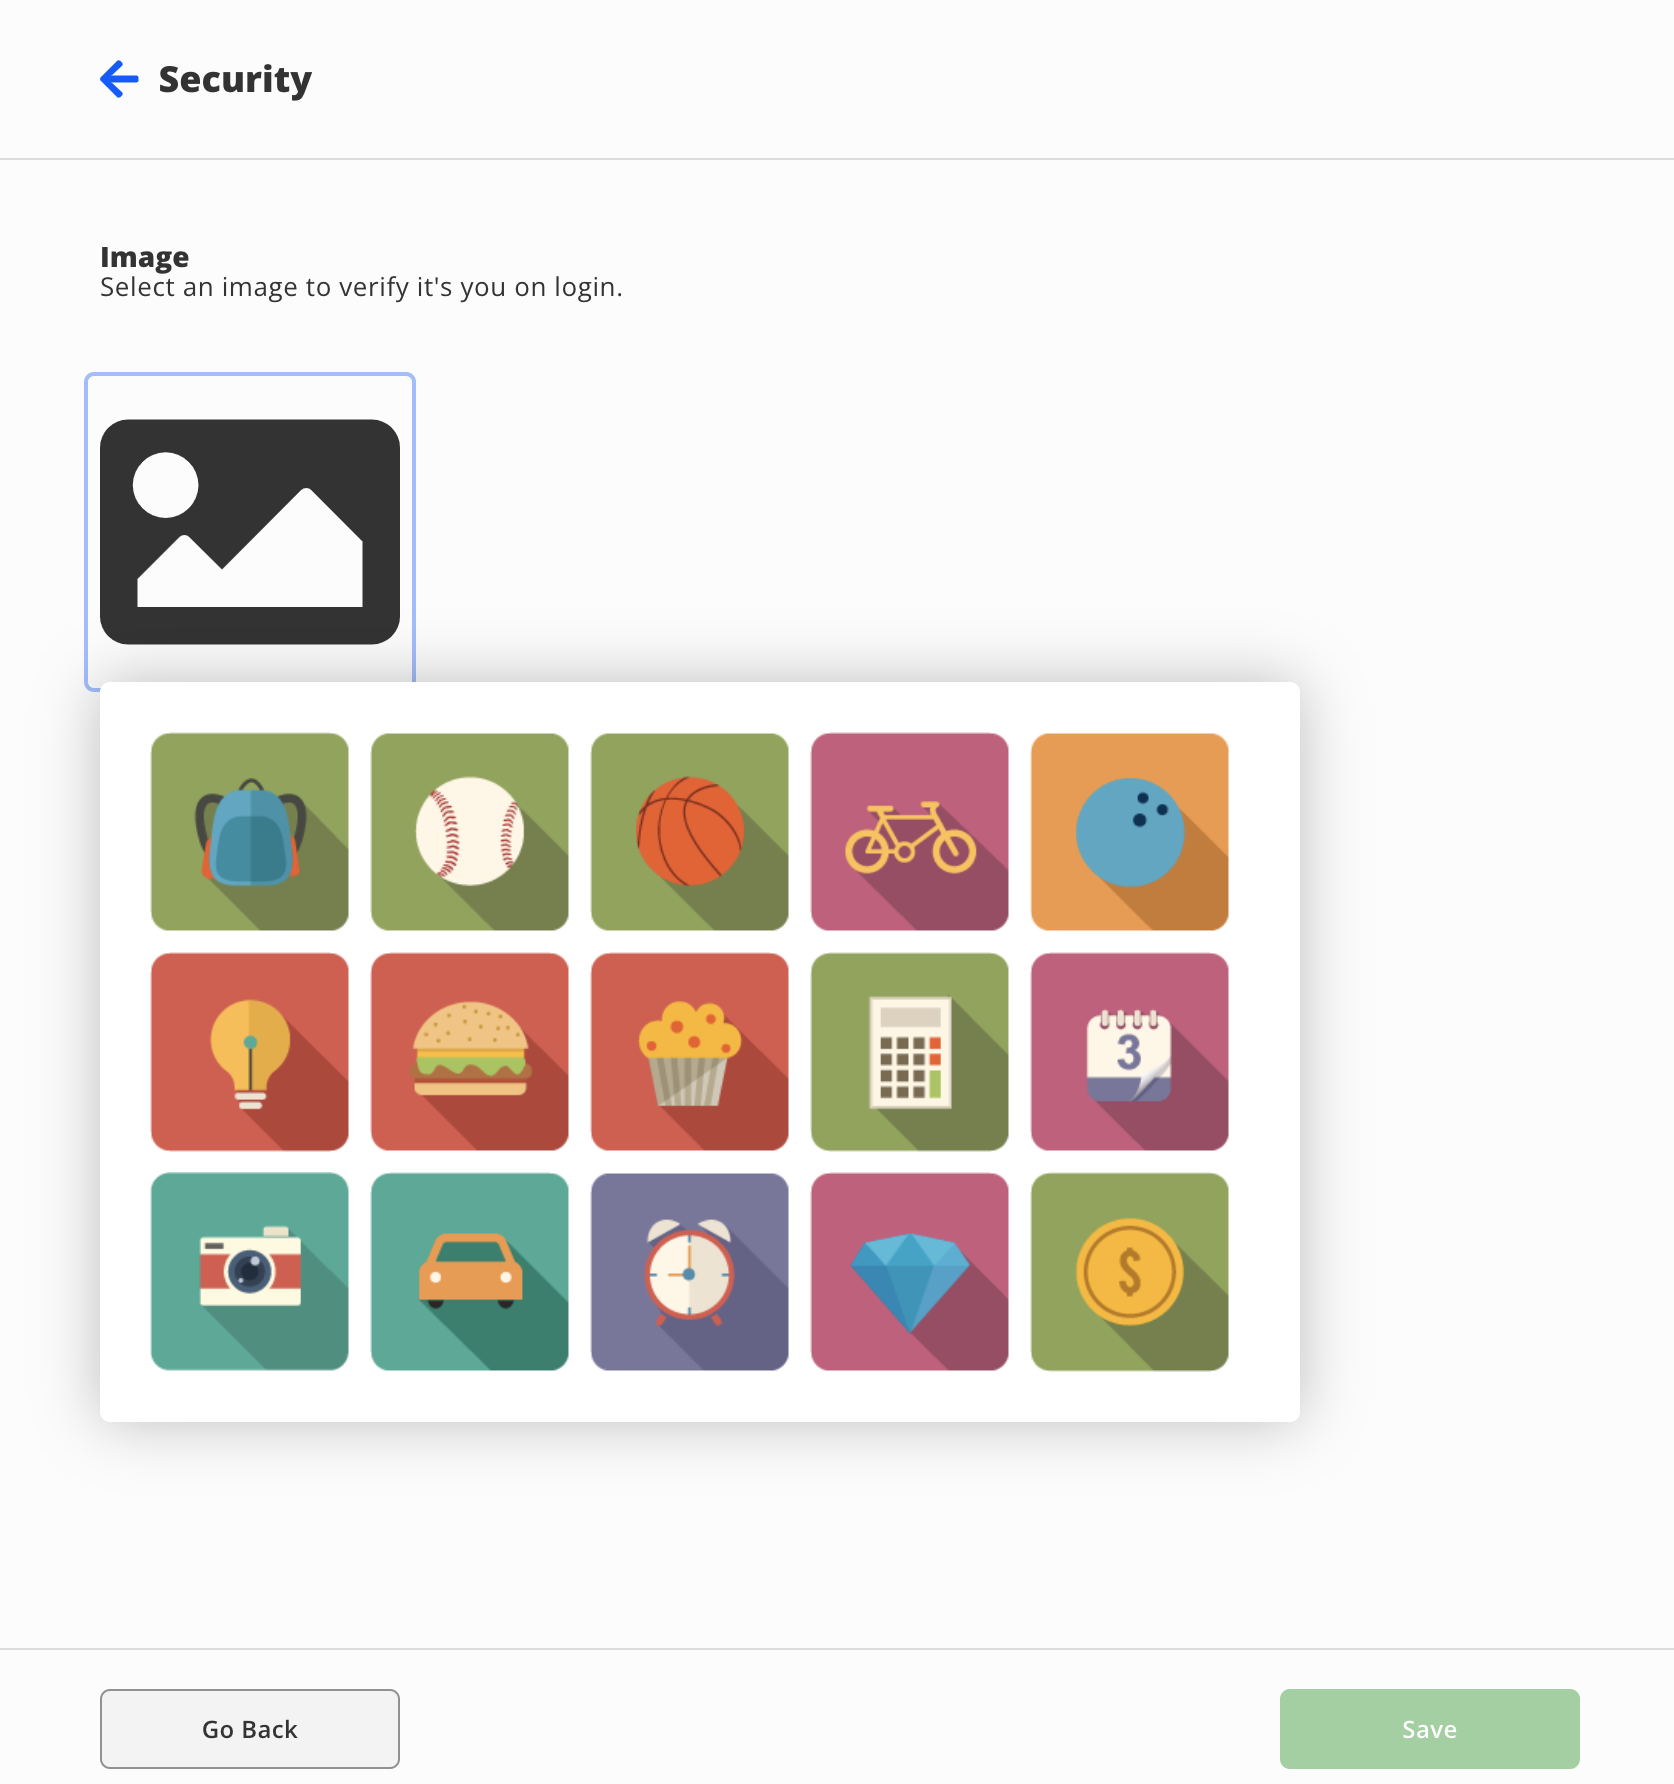
Here, simply select an image that you will remember, then click the green "Save" button at the bottom of the screen.
Note: you can scroll further to view more images than the ones initially shown.
You're all set! You may be asked to select the correct image next time you log in.