
Locked Print
Overview
Ricoh printers support locked print jobs. Using this method, you can print a normal job, but require a passcode to be entered at the printer before the job will print. This is useful if you are printing something secure or if you want to make sure the job is not printed until you are standing in front of the printer.
You can set up locked print two different ways: locked print for all jobs, or locked print for a single job. Follow the directions below to set up locked print.
Locked print for a single job
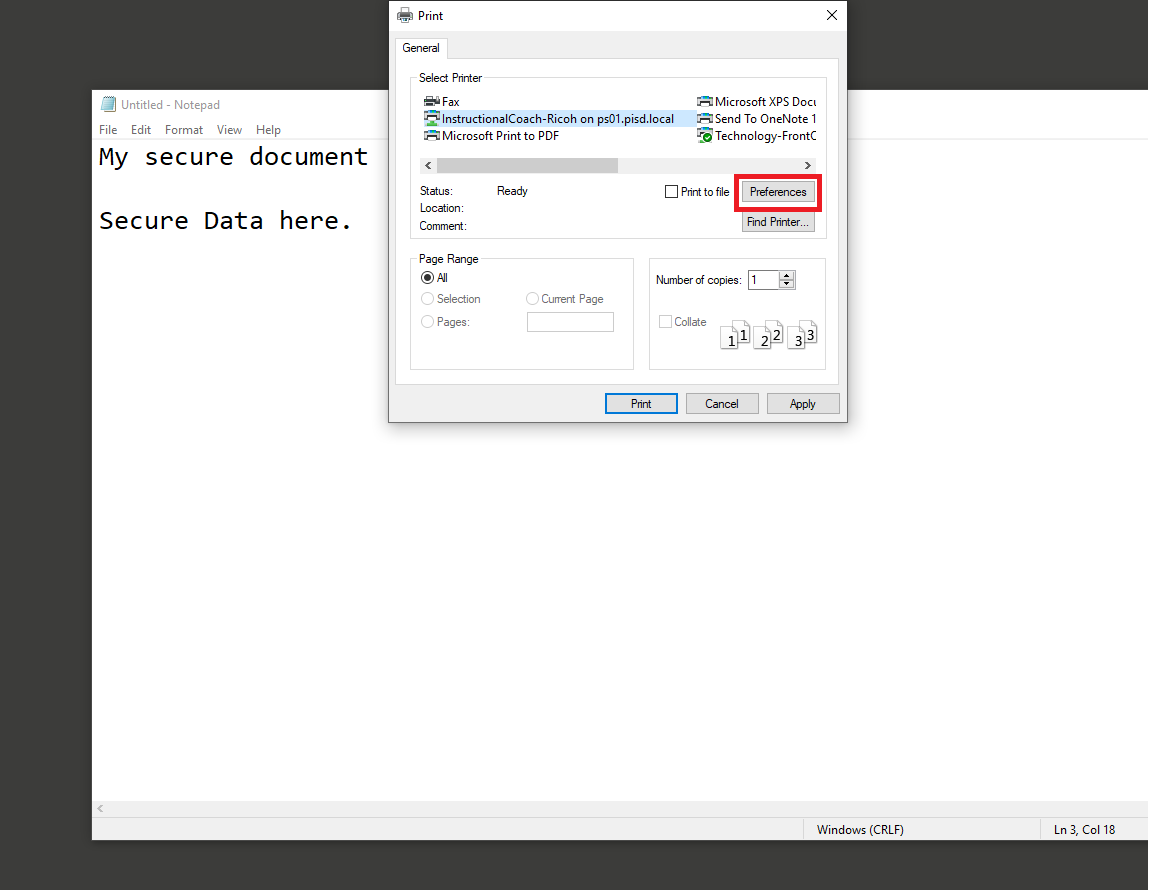
When printing, click the desired printer and click Preferences
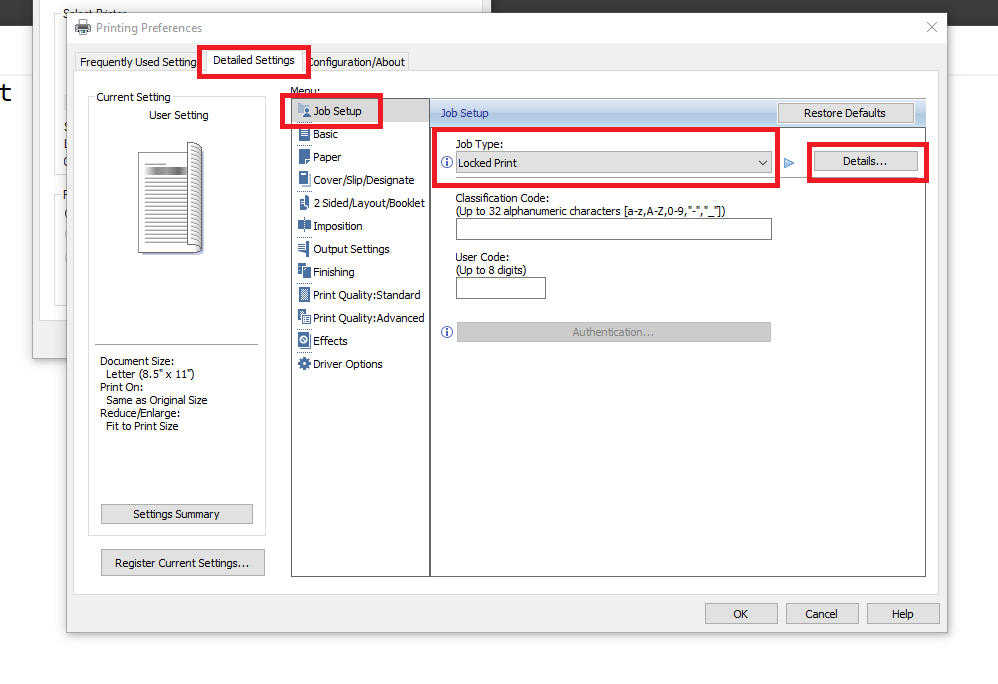
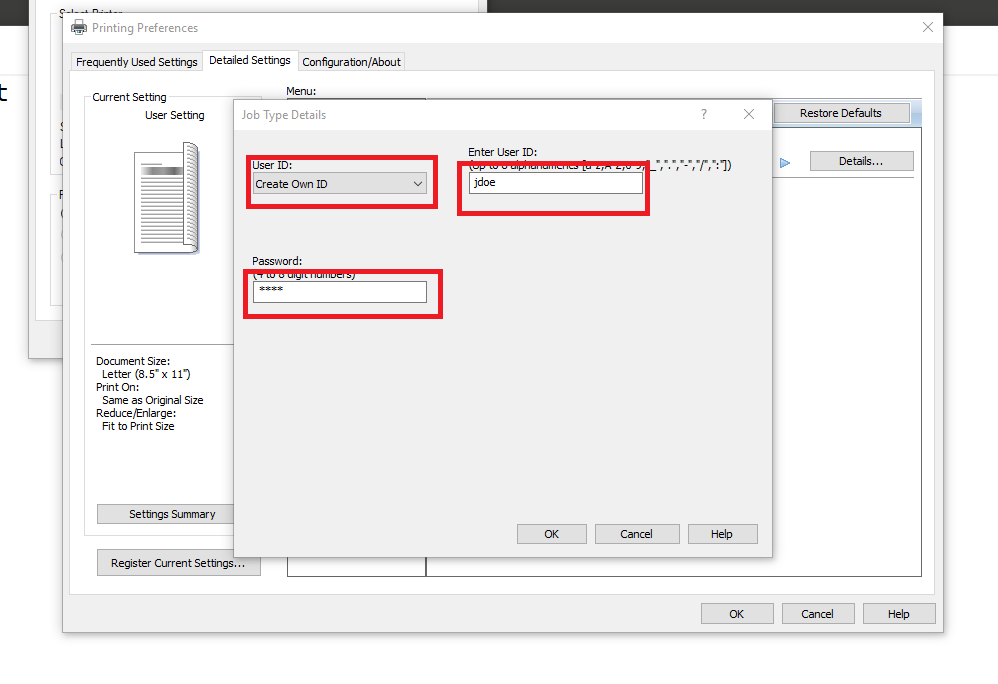
From the preferences menu, click the Detailed Settings tab at the top, click Job Setup in the Menu and select Locked Print from the Job Type drop-down. Click Details... to set your pass-code
Click here for directions on how to print your job at the Ricoh printer.
Locked print for ALL jobs
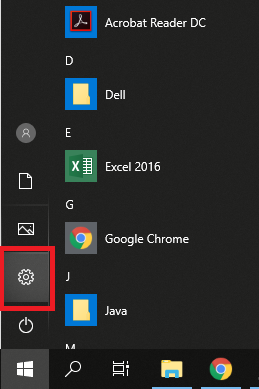
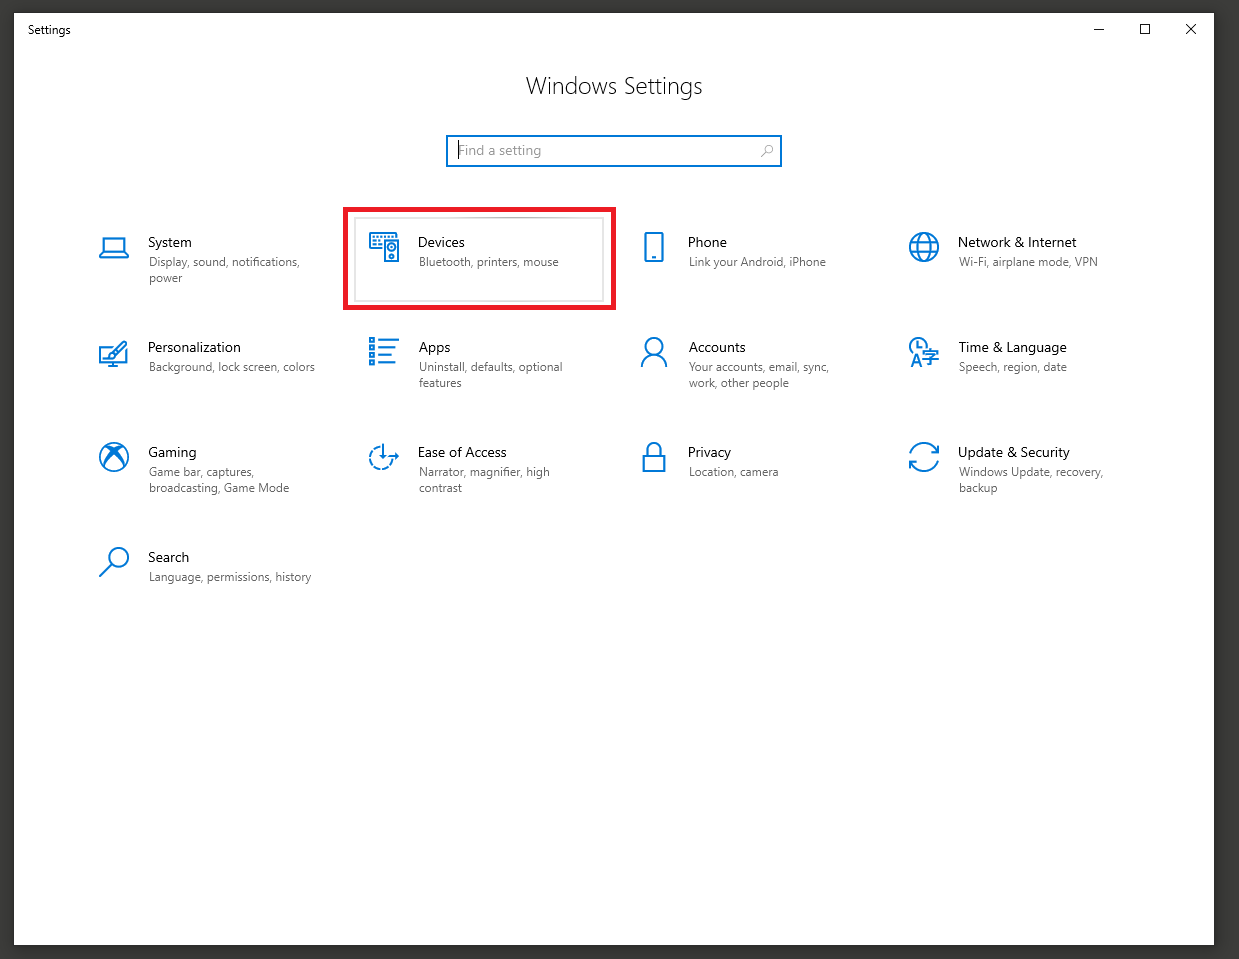
Click on the Start button and click the settings gear
Click Devices on the Windows Settings page
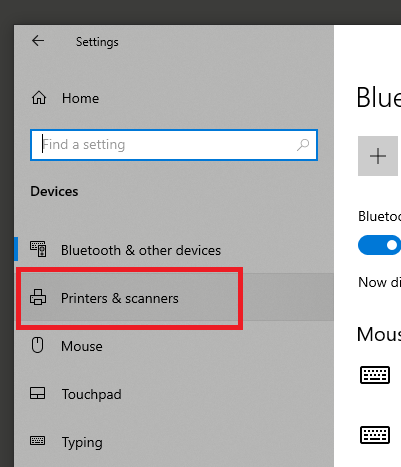
Click Printers & scanners on the left side of the window
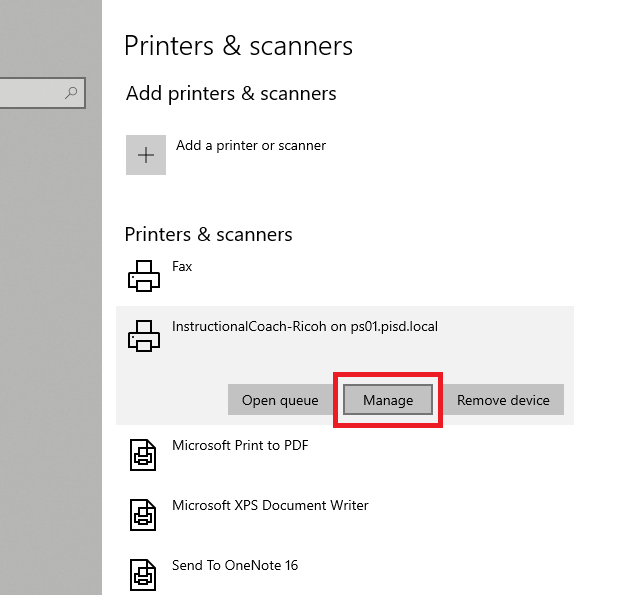
Click the Ricoh printer you want to set up for locked printing and click Manage
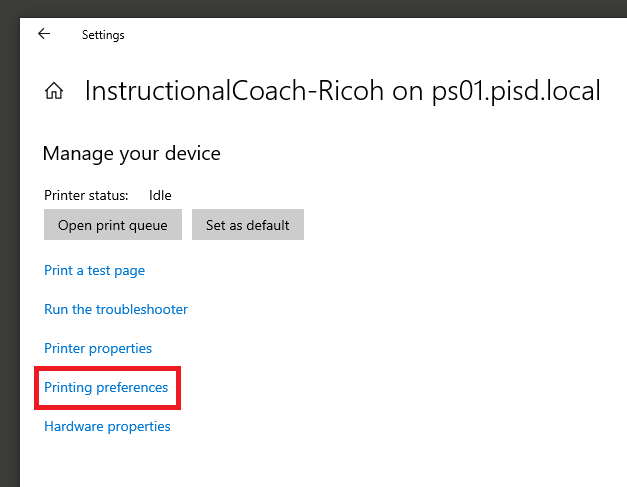
Click Printing Preferences
From the preferences menu, click the Detailed Settings tab at the top, click Job Setup in the Menu and select Locked Print from the Job Type drop-down. Click Details... to set your pass-code
Click here for directions on how to print your job at the Ricoh printer.
Printing locked print jobs at the Ricoh
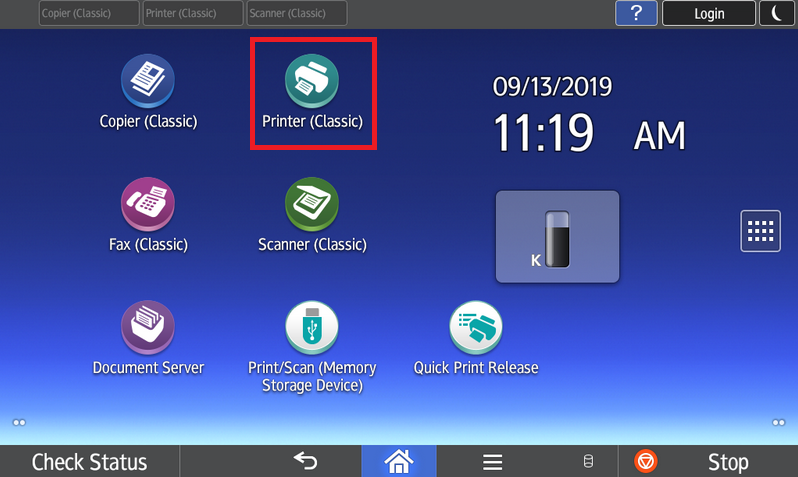
From the Ricoh Home Screen, open the Printer(classic) app
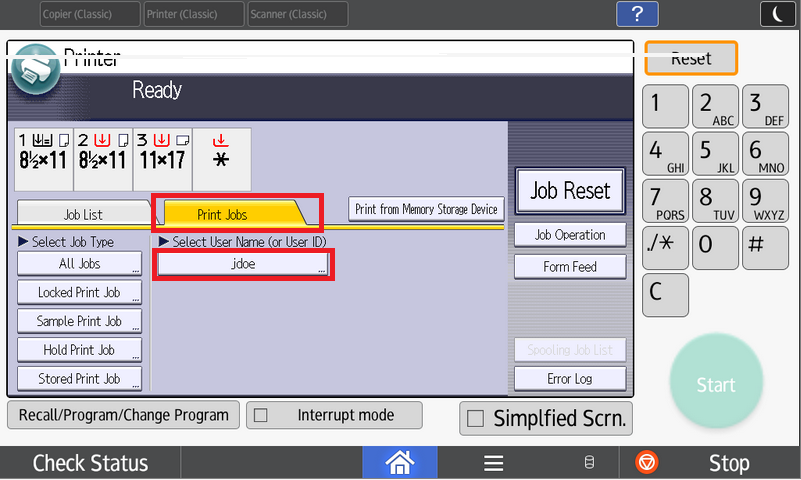
Click the Print Jobs tab and click the username you created earlier. If your print job is not here, please try re-sending the job using the previous directions. If this does not work, please open a helpdesk ticket in Eduphoria.
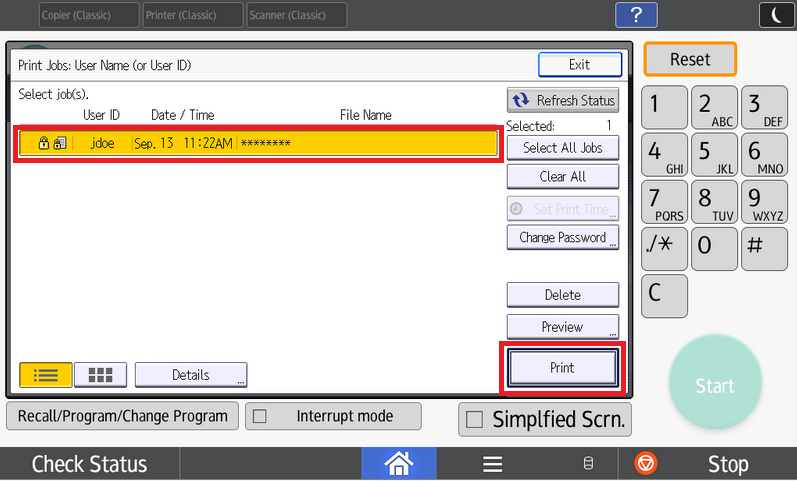
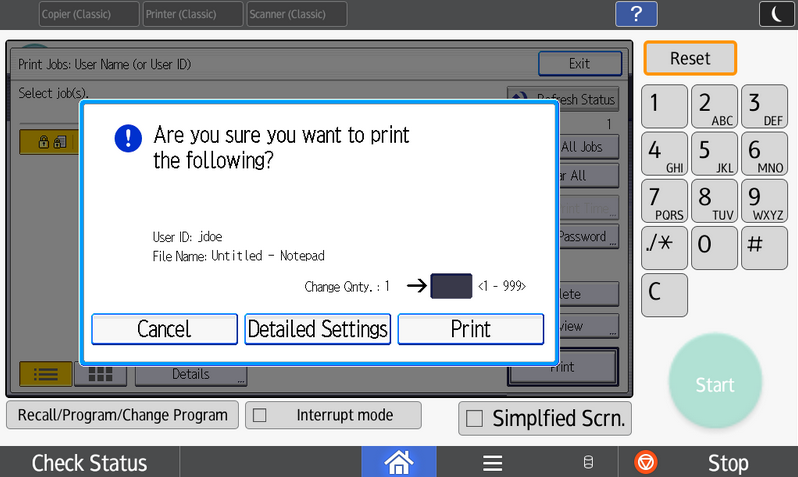
Click the print job that you want to print and click Print. If you have multiple locked print jobs queued, they will be listed on this page.
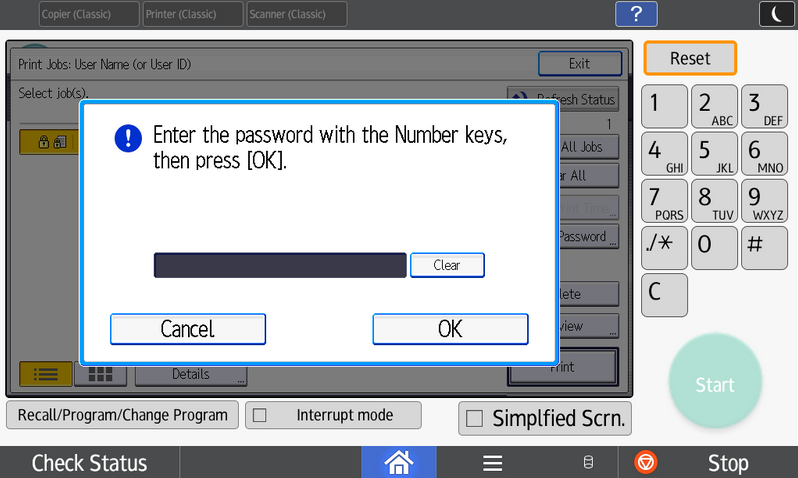
When asked for a password, enter the passcode you created earlier and click OK.
On the next confirmation page, click Print and your document will print
If any of these steps do not work or if you need assistance with this problem, please create a helpdesk ticket in Eduphoria.